Change the Network on a vRA onboarded VM
In this post I want to show you a way how you can change a the VM Network with a vRA Day 2 Operation on a vRA Cloud.vSphere.Machine. This is only a Workaround and has some disadvantages. The biggest disadvantage is that you will loos the Deployment History, because we have to onboard the VM again after the Network change and a new Deployment will be created. this make it possible to show the correct, changed network in the Deployment network resource. Keep in mind, all the provided vRO Packages are only for demonstration purposes and not for a production use. If you want to use it for production you have to thinking about error handling, performance, scalability etc.
For this we need the following steps:
For the first step we need a Workflow where the VM Network changed via the vSphere API. In this example I show only the change of a Portgroup from a Distributed Virtual Switch (DVS), but you can expand it for Standard Switch Networks, as you want.
Here is the Workflow Schema
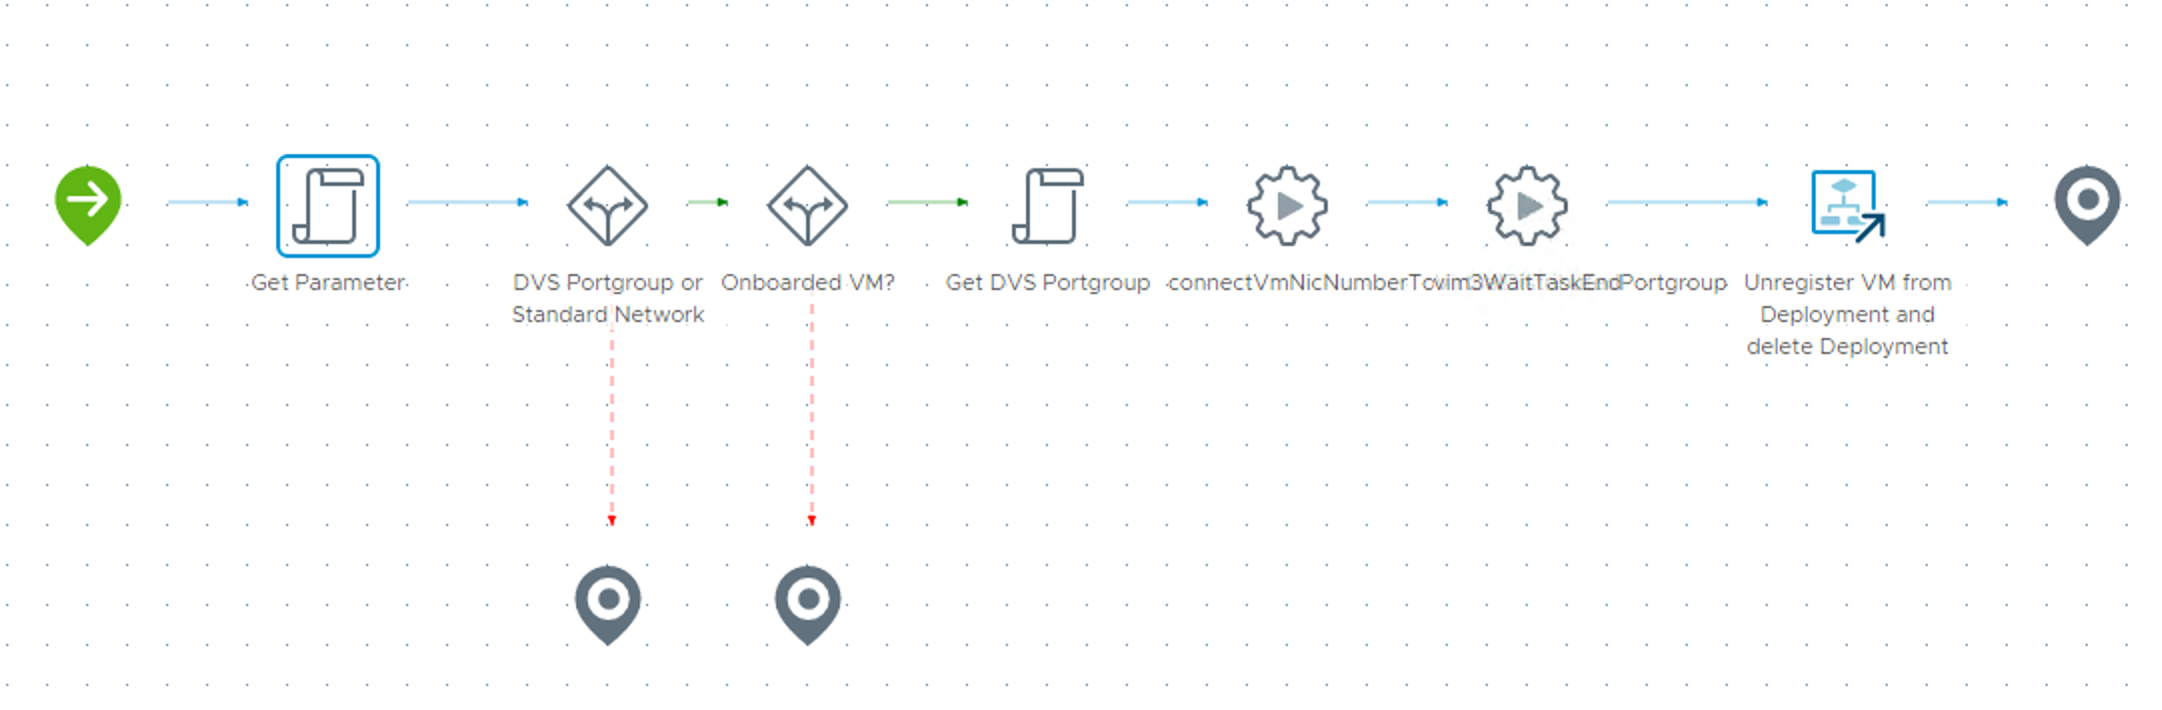
In the “Get Parameter” scriptable task, we will collect all parameters where we need in the next steps in our workflow. In the first decision we check whether it is a DVS Portgroup or not. In case of a DVS Portgroup we continue. In the “red arrow” path you can add a Step where you change the network on a standard Switch. The second decision checks whether we have a onboarded VM or a vRA provisioned. In the “red arrow” path you can add a step to change the network on a vRA provisioned machine. I will show this in another post. In the next scriptable task we will get the portgroup, the new network which should be set to the VM. In the next step we call an Action which change the network via the vSphere API. The next Action wait until the Network change task is finished. In the last step we run a Workflow where we unregister and delete the deployment. The Workflow must be running in a asynchron process, because in vRA you can have only one running action at the same time. this means our performed Day 2 Operation (Action) to change the Network on the VM is currently running and must be finished before we can start the next step where we unregister the VM. The is the reason for the asynchron call of the Workflow.
Here is the Schema from the unregister VM and delete deployment Workflow
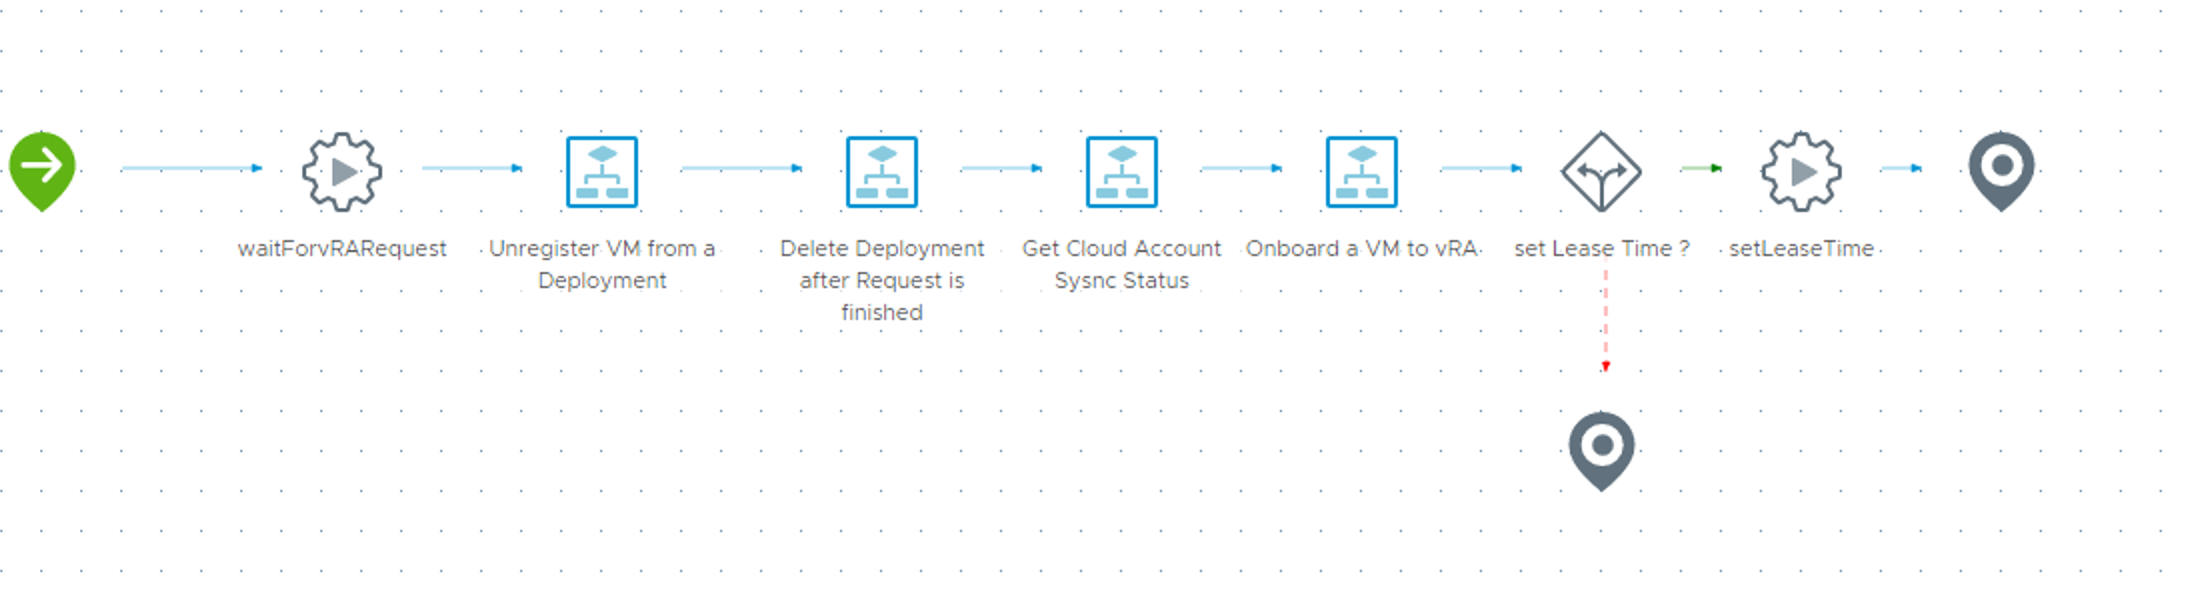
In the first step we call an action where we wait for the vRA request (our performed Day 2 Operation to change the network of the VM). In the second step we call a Workflow where we unregister the VM from the deployment. In the next step we delete the deployment. After that we wait for the vCenter data collection performed by vRA all 10 minutes. After the data collection is finished we onboard the VM again. The next two steps are used for another use case from a customer who want to set a lease time on the VM, if the VM network changed to a productive network based on Tags. I will show this in another post.
Now I have explained all needed steps and you can try it by yourself.
Here you can download the vRO package:
Next steps are:
Create the Tags
We have to Tag all Networks which should be used by vRA. With this Tag we figure out the Networks which are provided in our Day 2 Operation form as selectable networks. The Key of the Tag called vRA-Network and the value is the name of the network.

Please, Tag all networks which should be used / visible in the request form.
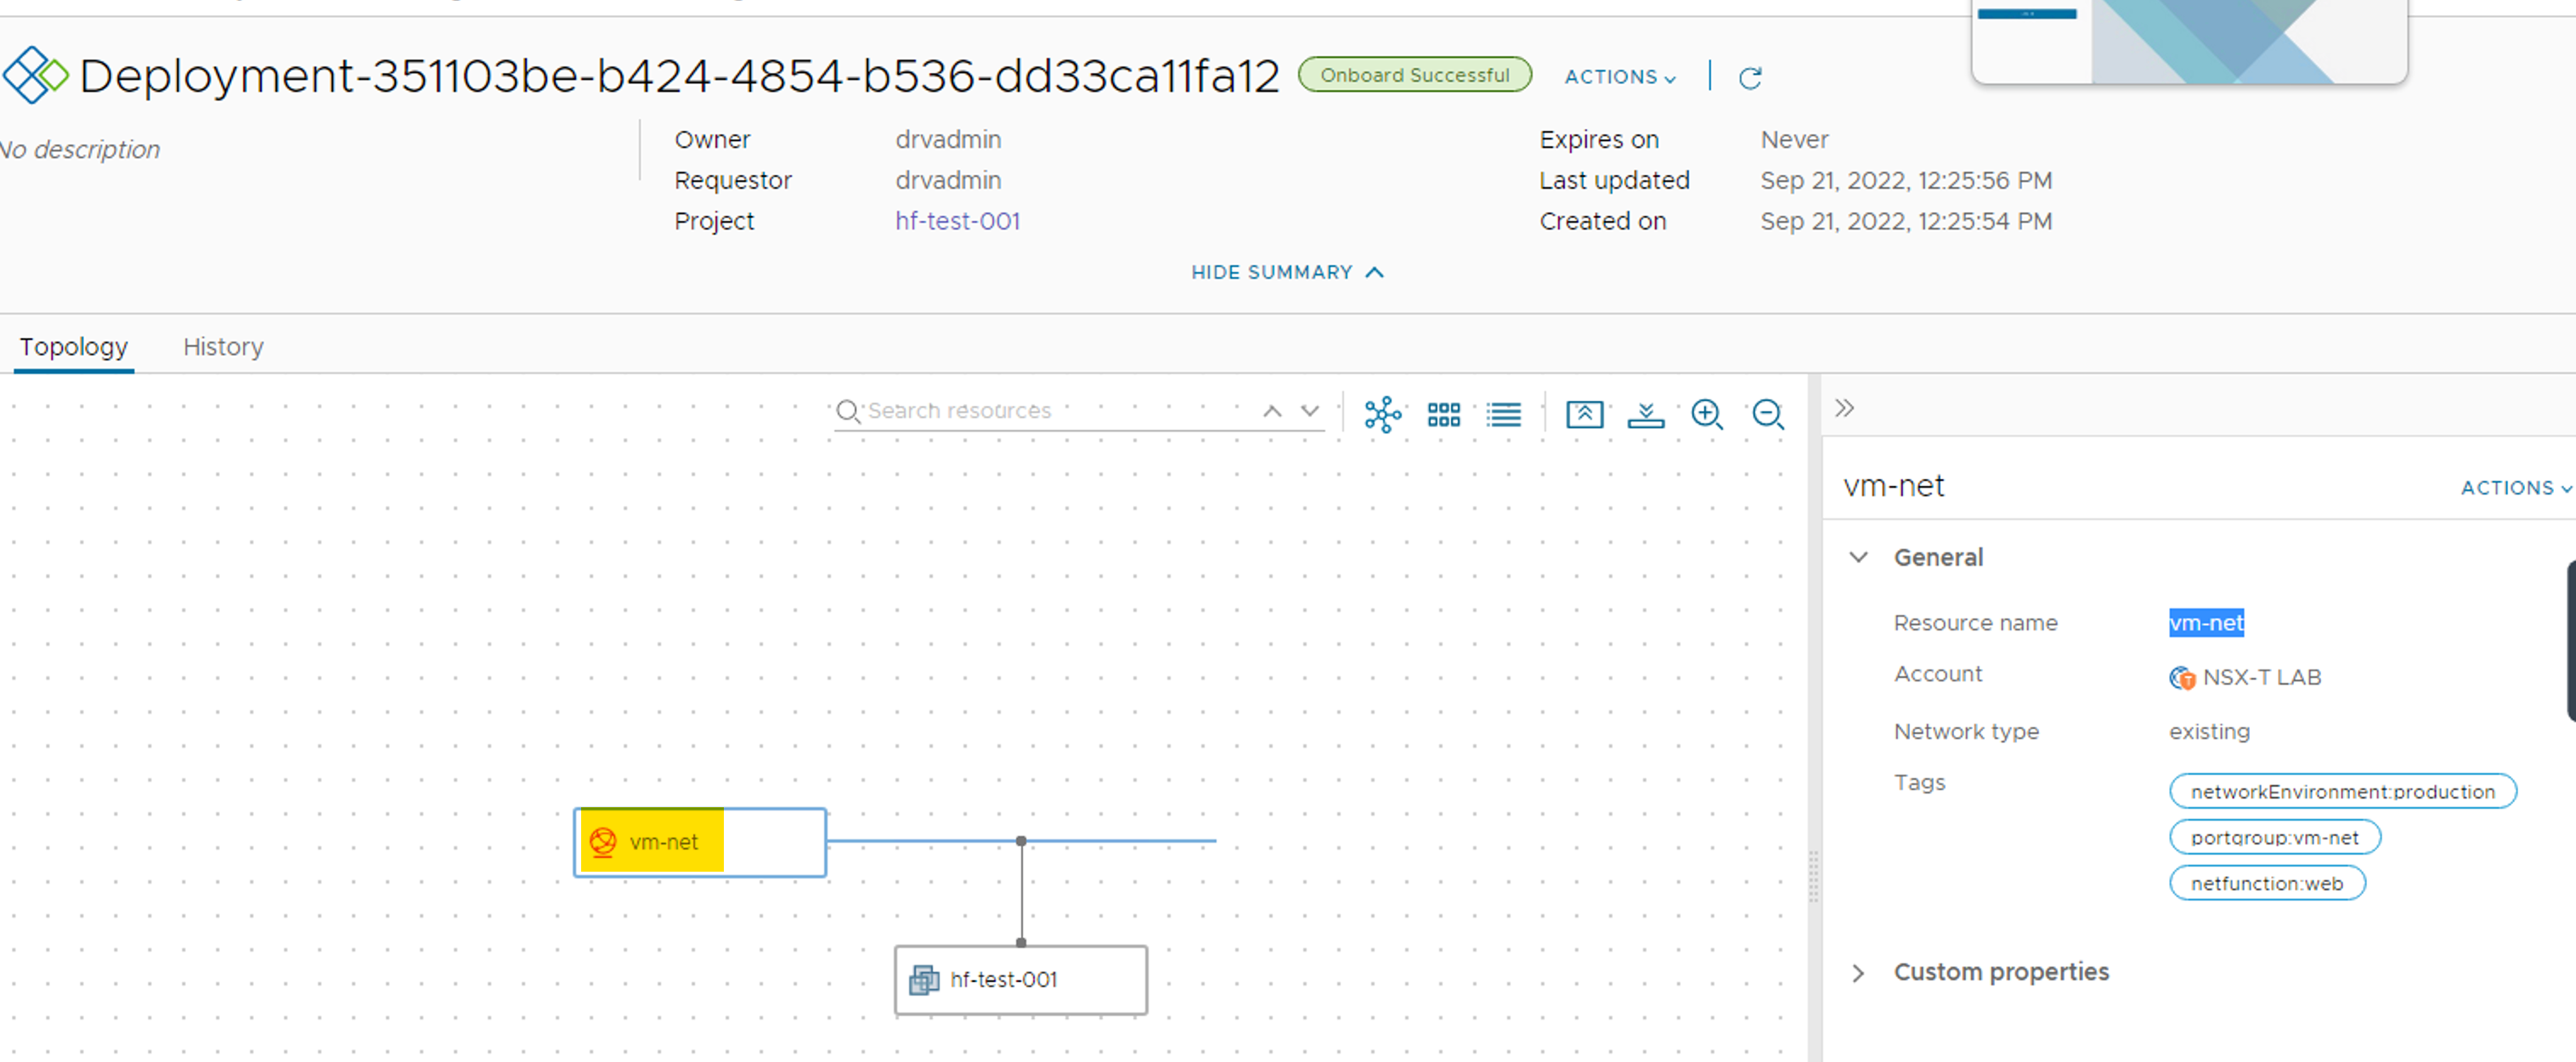
The second Tag key is called portgroup and the value is the name of the network, see screenshot above
The VM tagging is show below:

Tag all onboarded VMs with the “origin” key Tag
Create the Resource Action
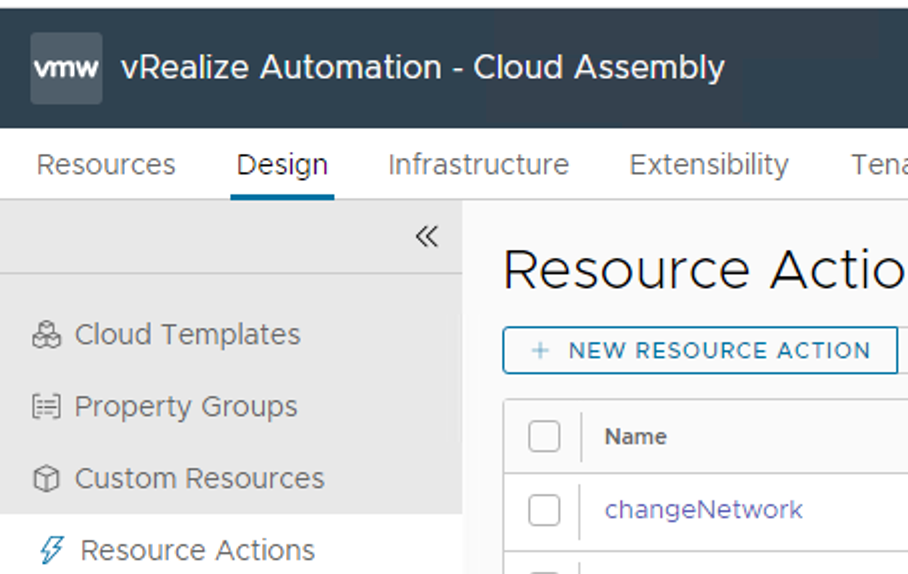
For this log into vRA Cloud Assembly. Go to Design > Resource Actions and click on NEW RESOURCE ACTION
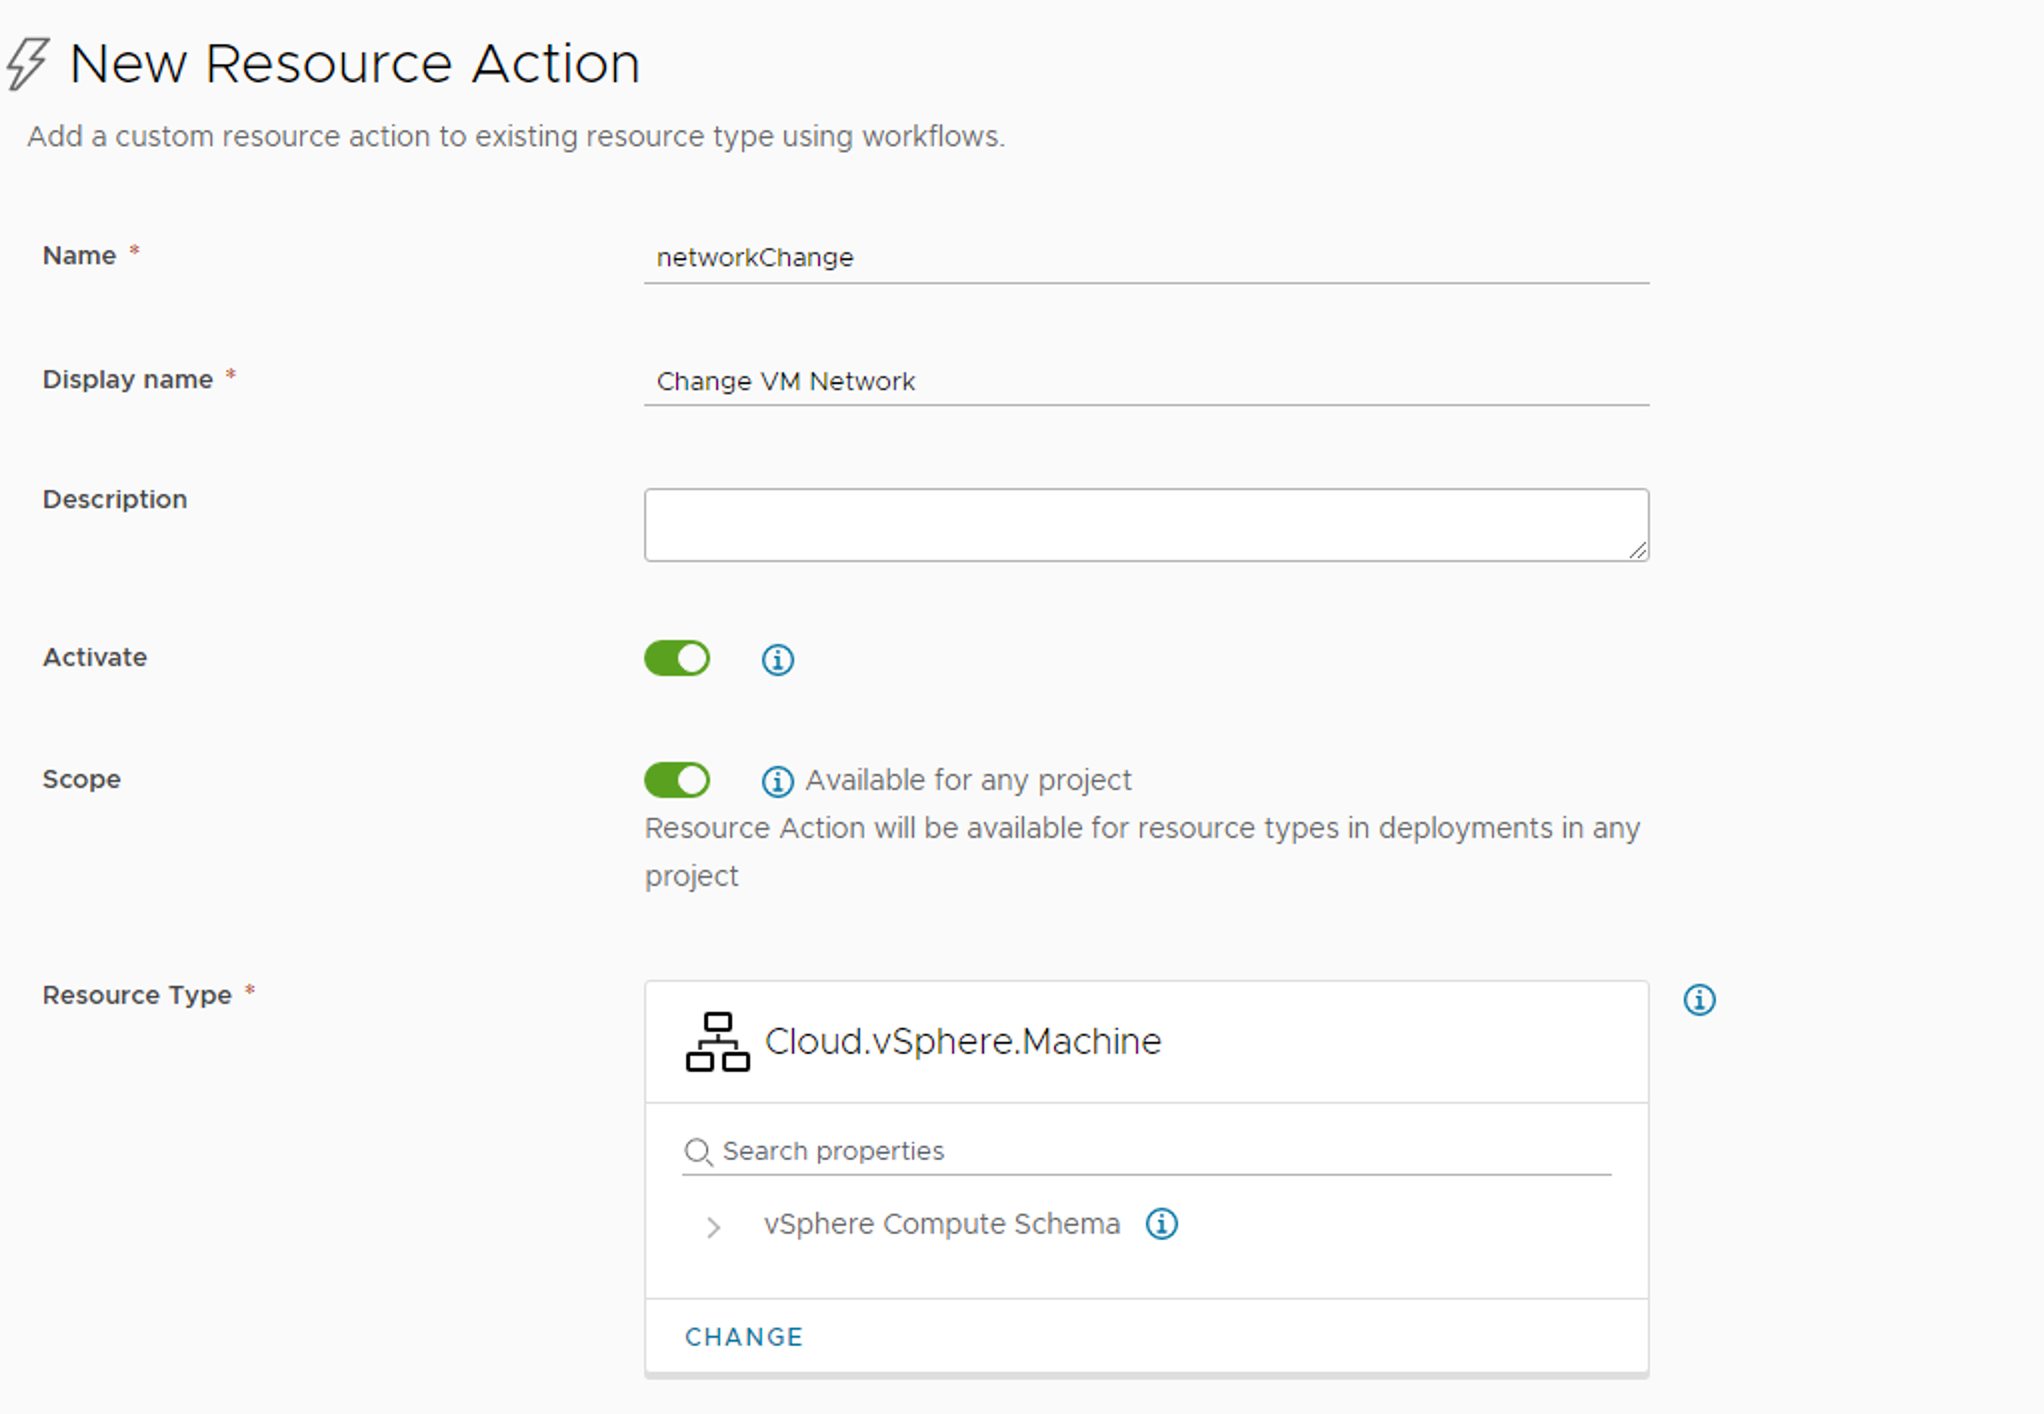
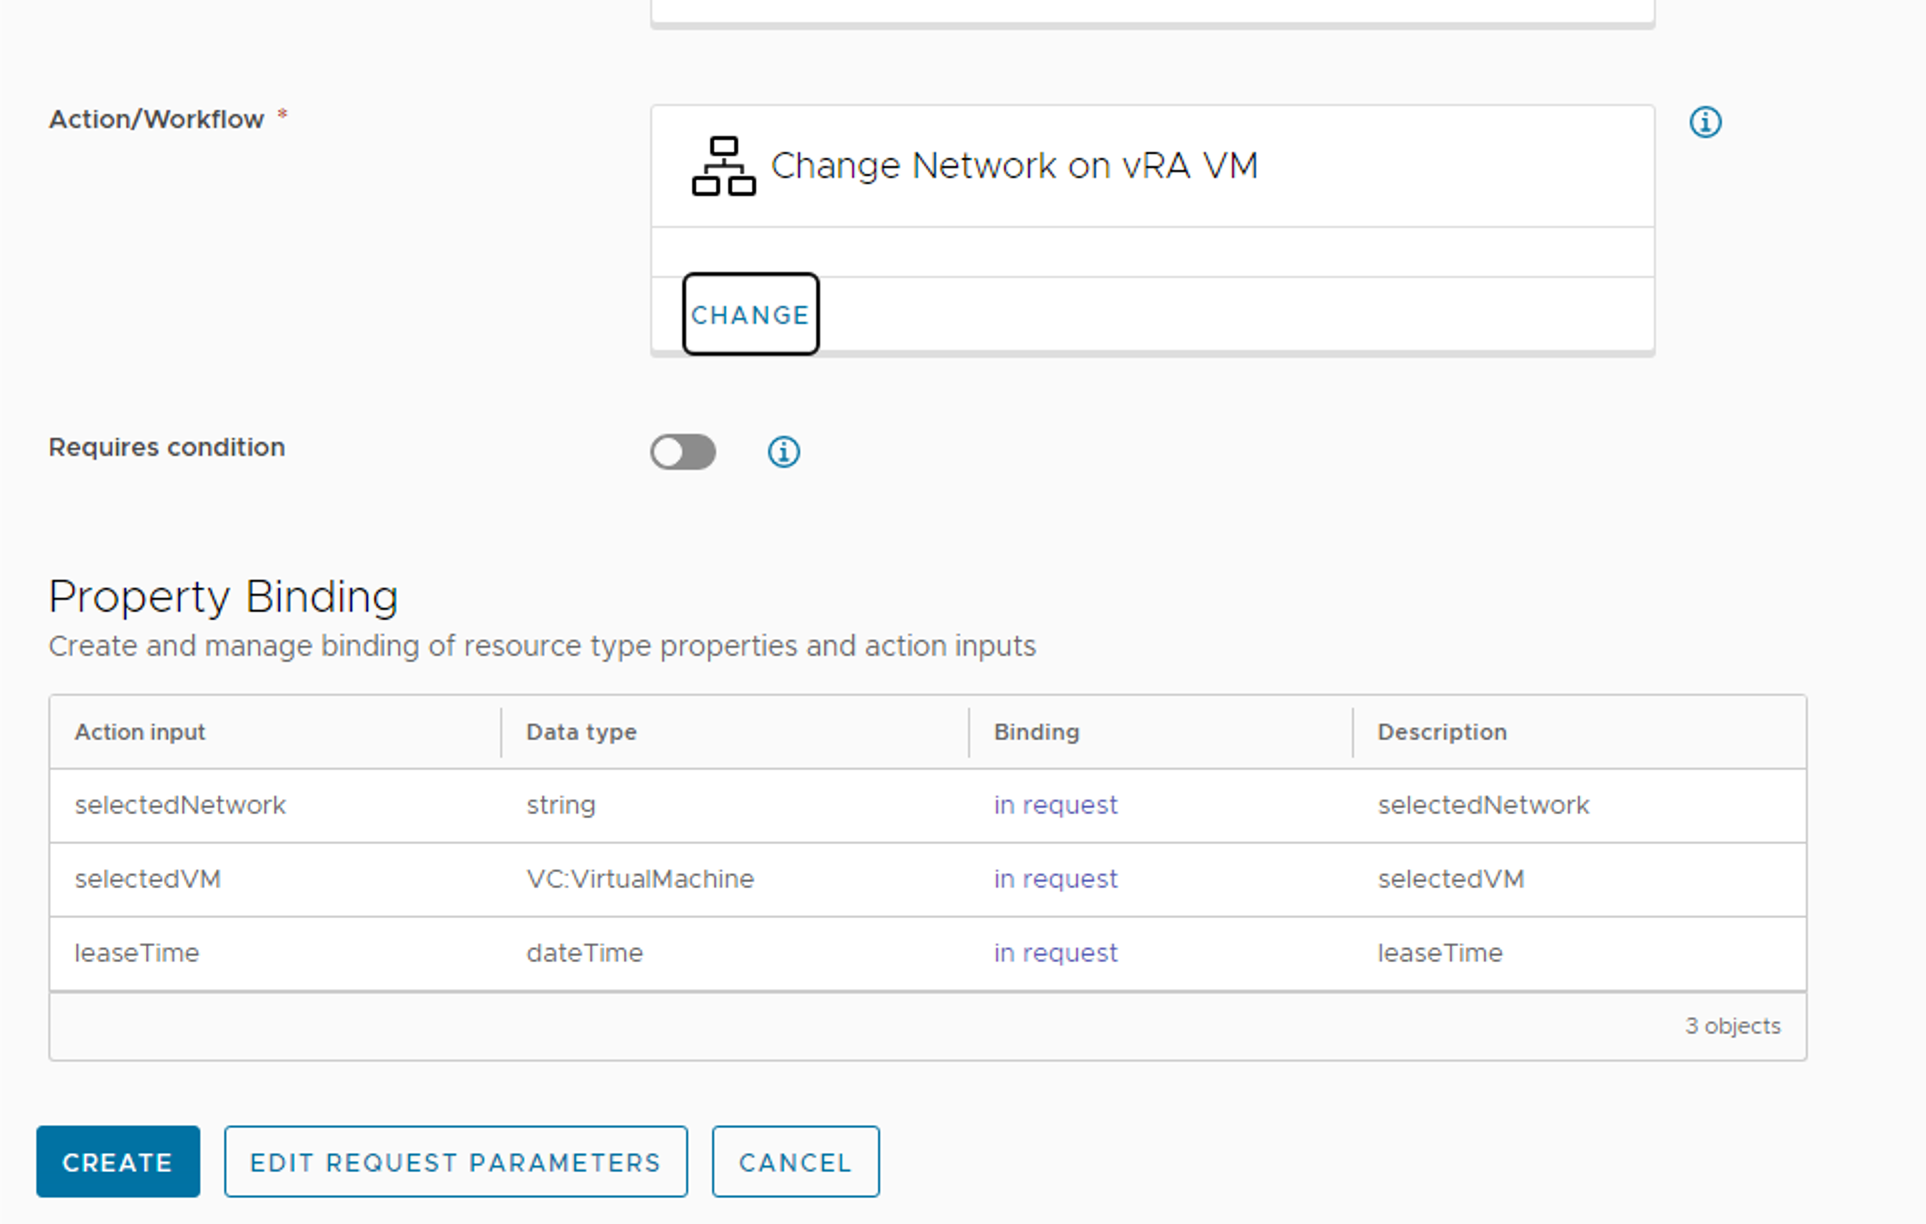
Enter all values as shown above and click on CREATE button.
Now we have to modify the Property Binding.
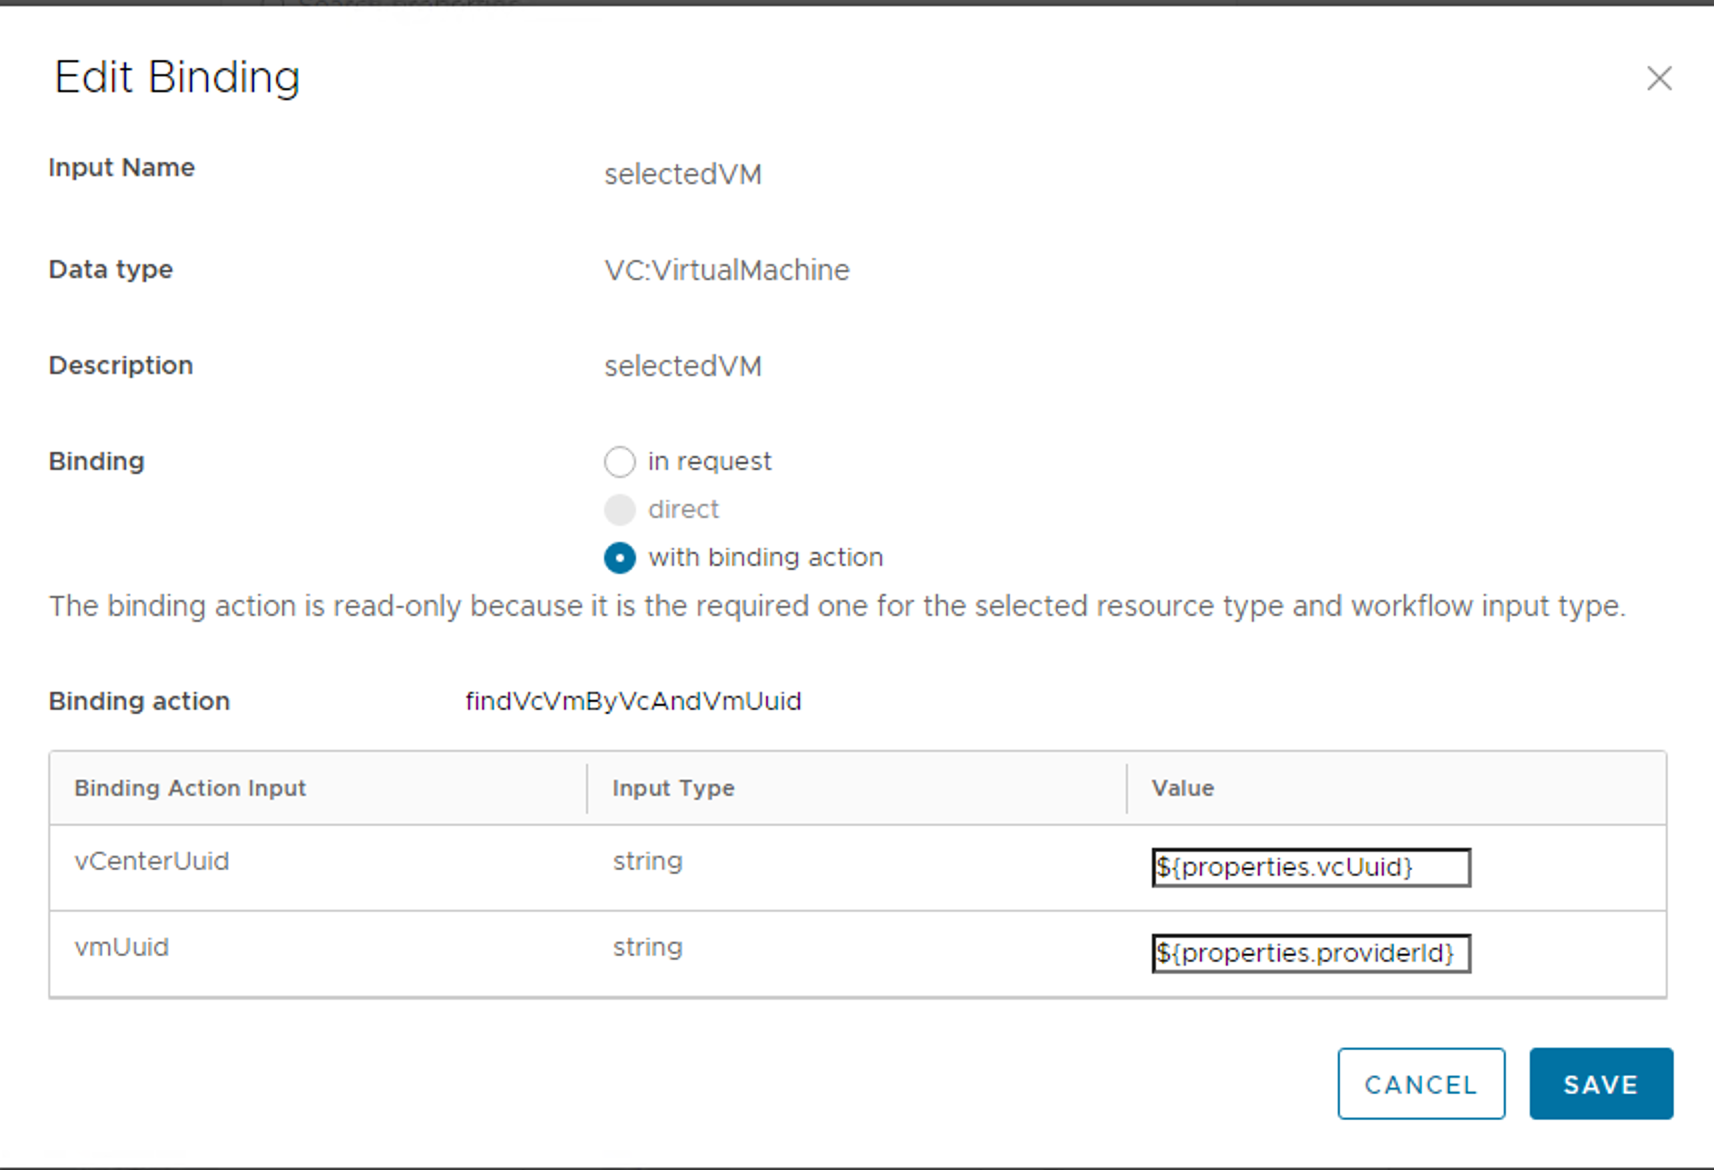
Click on the “selectedVM” Binding link (in request) and change it as shown below
The next we have to edit the request parameters. Click on EDIR REQUEST PARAMETERS button.
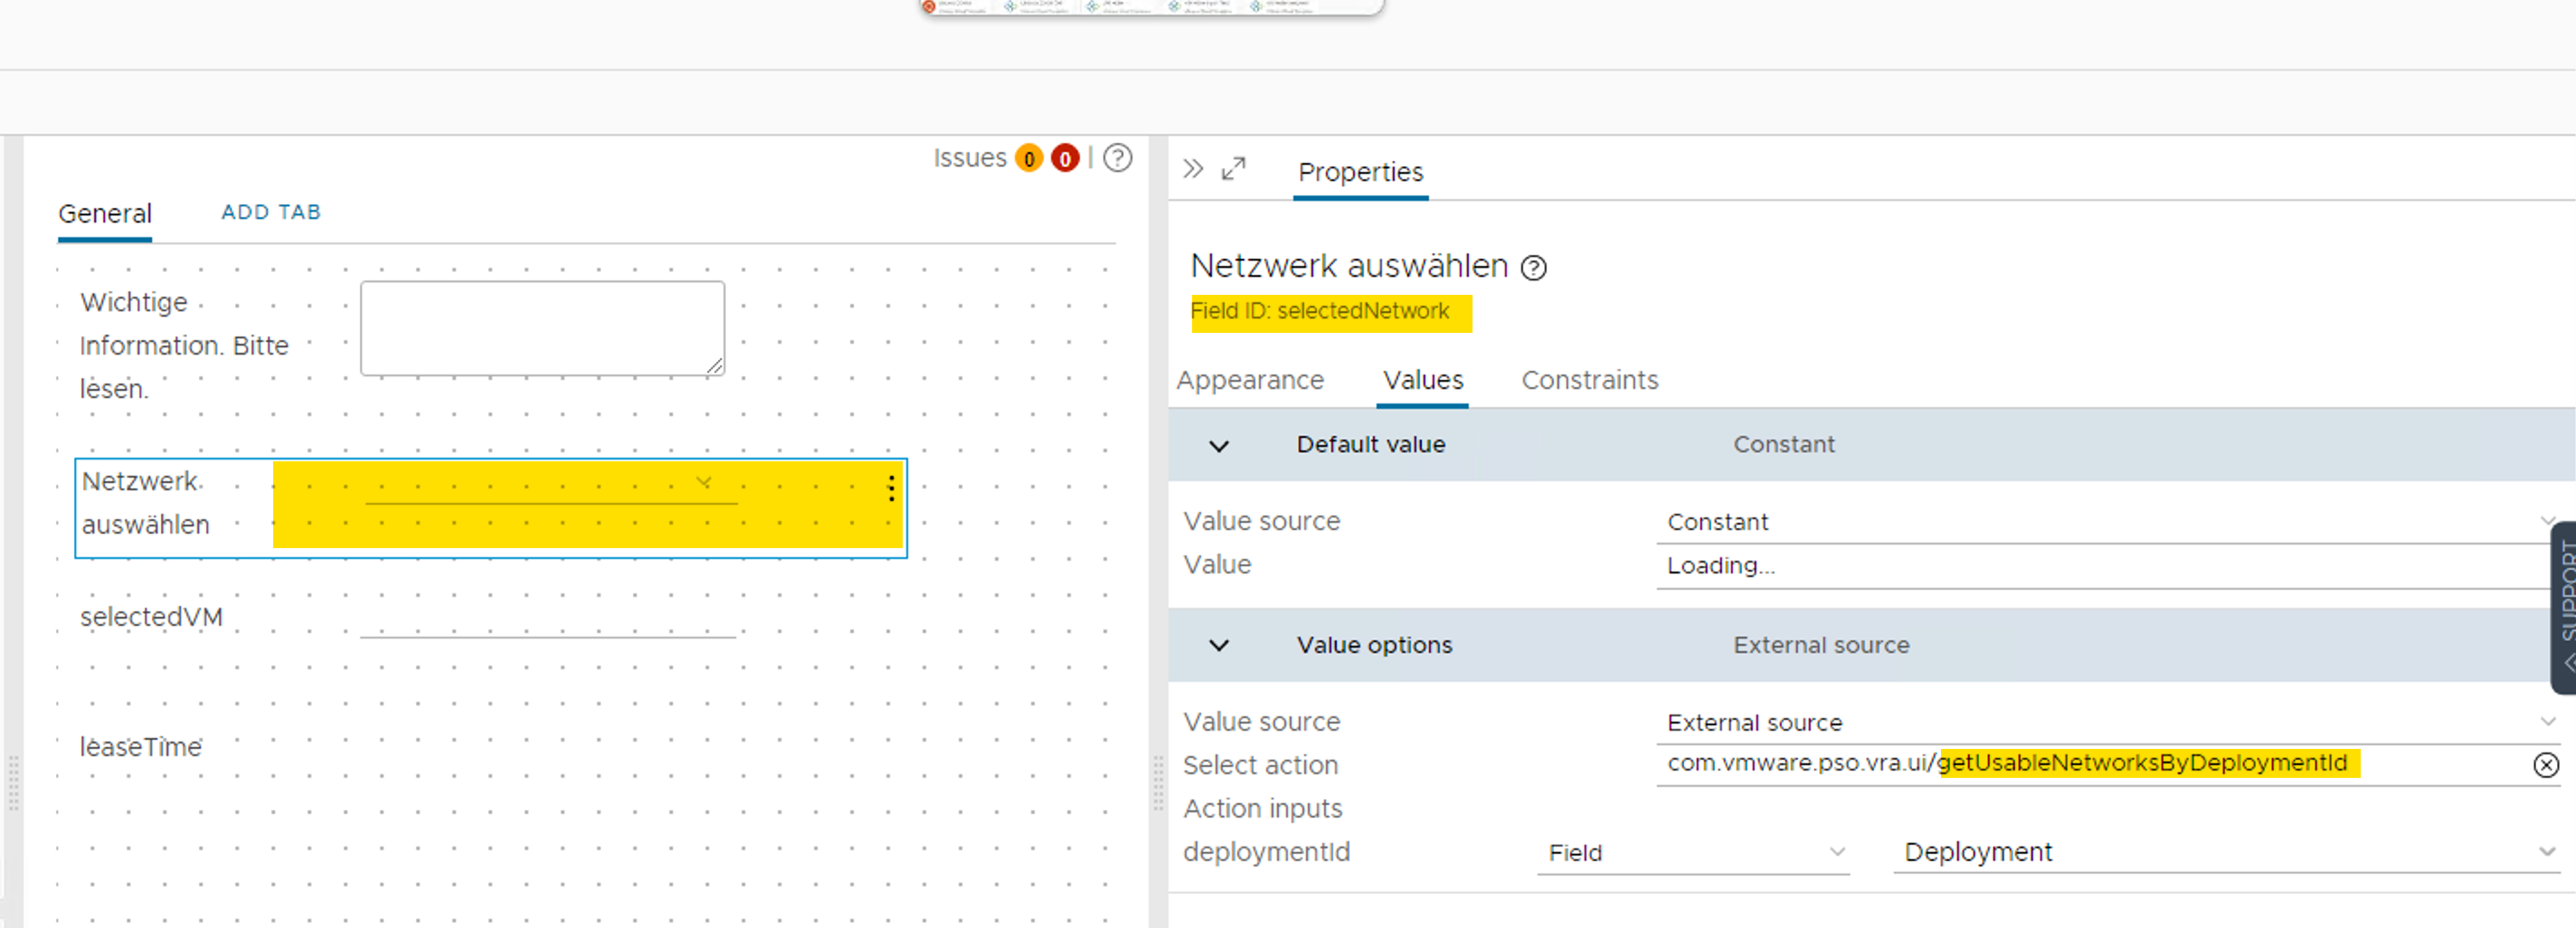
Go to Values and add / search the yellow marked action. Provide the Deployment field as input as shown above.
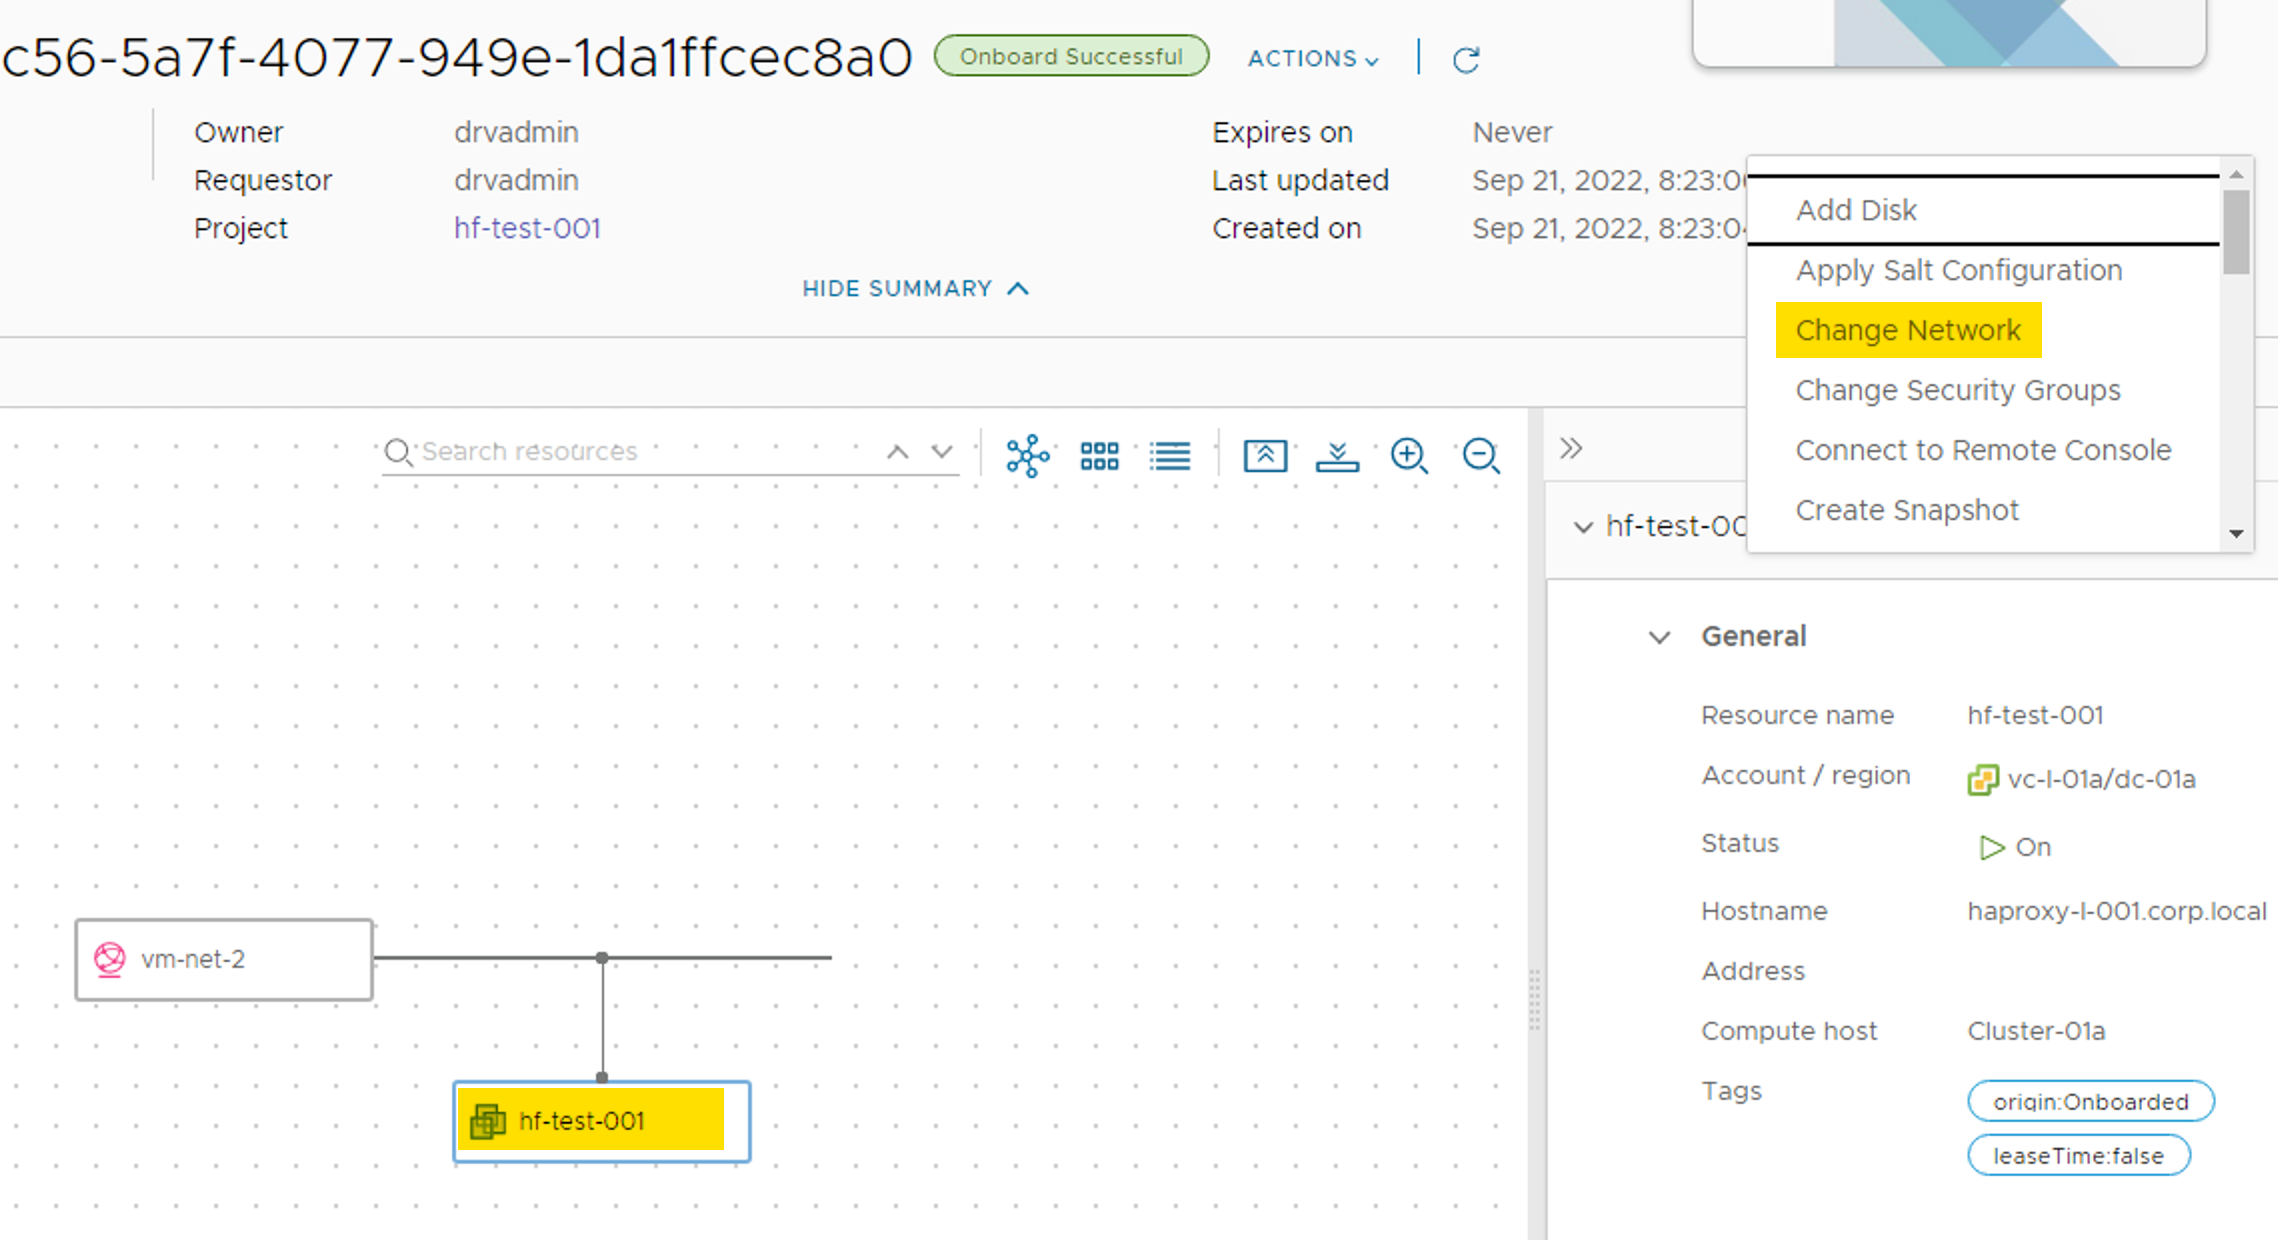
After this you should have a additional Day 2 Operation on your VM resource as shown below.
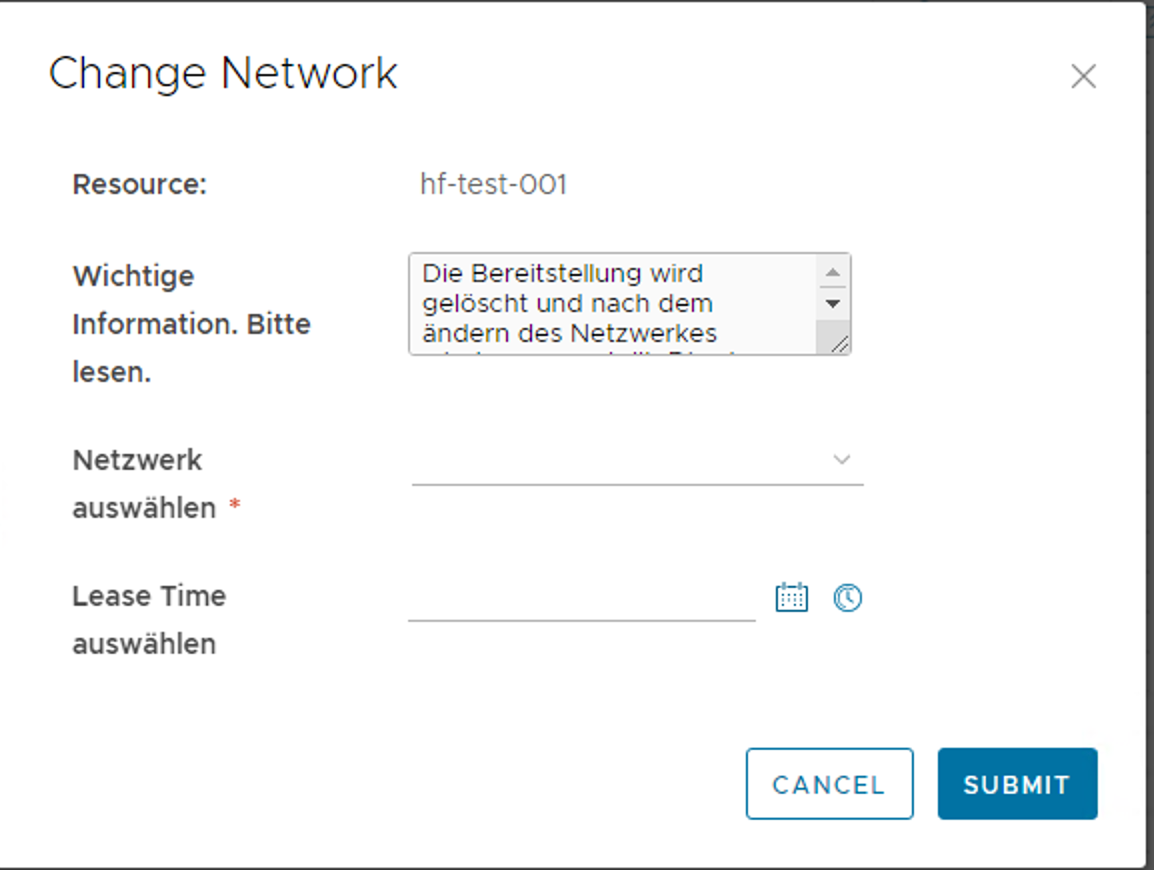
Select a Network (“Netzwerk auswählen). The Lease time is optional. If you set a Lease Time then the Lease Time will be set on the VM.
After the Day 2 Operation is finished, you should see the changed network in the deployment.