Configure NFS on Ubuntu 20.04 and use it with an VMware ESXi Host
In this blog I will show you how you can configure a NFS-Server on a Linux Ubuntu 20.04 machine and use it with an ESXi Server.
Prereqisites
Set Up the NFS Server on the Ubuntu Linux machine
The first steps are to install the NFS packages, then configure NFS and if the firewall active set the rules which a needed for the NFS connection.
Installing the NFS Server on the Ubuntu Linux machine
sudo apt update
sudo apt install nfs-kernel-server
After the installation is finished you can check the installation with the command
sudo cat /proc/fs/nfsd/versionsThe output should looks like
-2 +3 +4 +4.1 +4.2
This means the version 2 is disabled. The version 2 is a very old version and we don´t need it.
We will use the version 3 in our case.
The NFS Server configuration files are located under
/etc/default/nfs-kernel-server and
/etc/default/nfs-common
The default settings are sufficient for most cases.
Creating the file system used for NFS
I our case we will create a directory called /srv/nfs3/iso
sudo mkdir -p /srv/nfs3/isoNow we create a mount point (bind) to this directory
sudo mkdir /var/iso
sudo mount --bind /var/iso /srv/nfs3/iso
To make ensure that the mount binds are persistent after a reboot, we have to add it to the fstab file /etc/fstab.
sudo nano /etc/fstab# /etc/fstab: static file system information.
#
# Use 'blkid' to print the universally unique identifier for a
# device; this may be used with UUID= as a more robust way to name devices
# that works even if disks are added and removed. See fstab(5).
#
# <file system> <mount point> <type> <options> <dump> <pass>
# / was on /dev/ubuntu-vg/ubuntu-lv during curtin installation
/dev/disk/by-id/dm-uuid-LVM-2jXL0l1oyCb7XHYB7NBToRtRBCyeTDibp3j2kCjHvGyWg1vvRfuArdNtjsdpahbz / ext4 defaults 0 1
# /boot was on /dev/sda2 during curtin installation
/dev/disk/by-uuid/bb4beb02-00da-44ca-9068-e77507207c0a /boot ext4 defaults 0 1
/swap.img none swap sw 0 0
<mark>/var/iso /srv/nfs3/iso none bind 0 0</mark>That the clients are able to access the NFS share we have to modify the /etc/exports file
sudo nano /etc/exports# to NFS clients. See exports(5).
#
# Example for NFSv2 and NFSv3:
# /srv/homes hostname1(rw,sync,no_subtree_check) hostname2(ro,sync,no_subtree_check)
#
# Example for NFSv4:
# /srv/nfs4 gss/krb5i(rw,sync,fsid=0,crossmnt,no_subtree_check)
# /srv/nfs4/homes gss/krb5i(rw,sync,no_subtree_check)
#
<mark>/var//iso 192.168.0.0/16(rw,sync,no_subtree_check,no_root_squash,insecure)</mark>In my case the ESXi Servers are in the subnet 192.168.0.0/16.
After the /etc/exports file modification we must export the shares
sudo exportfs -arWith the following command we can verify whether the shares are exported or not
sudo exportfs -vThe output should looks like this
192.168.0.0/16(rw,wdelay,insecure,no_root_squash,no_subtree_check,sec=sys,rw,insecure,no_root_squash,no_all_squash)
Lets check the firewall status
sudo ufw statusIs the firewall status inactive, then we don´t need to add the rule for NFS, but if it active then we have to add the following rule, to make sure NFS is working.
sudo ufw allow from 192.168.33.0/24 to any port nfsConnect the created NFS share to the ESXi Server

Go to the Datastore -> Select the Datacenter -> go to ACTIONS -> Storage -> New Datastore
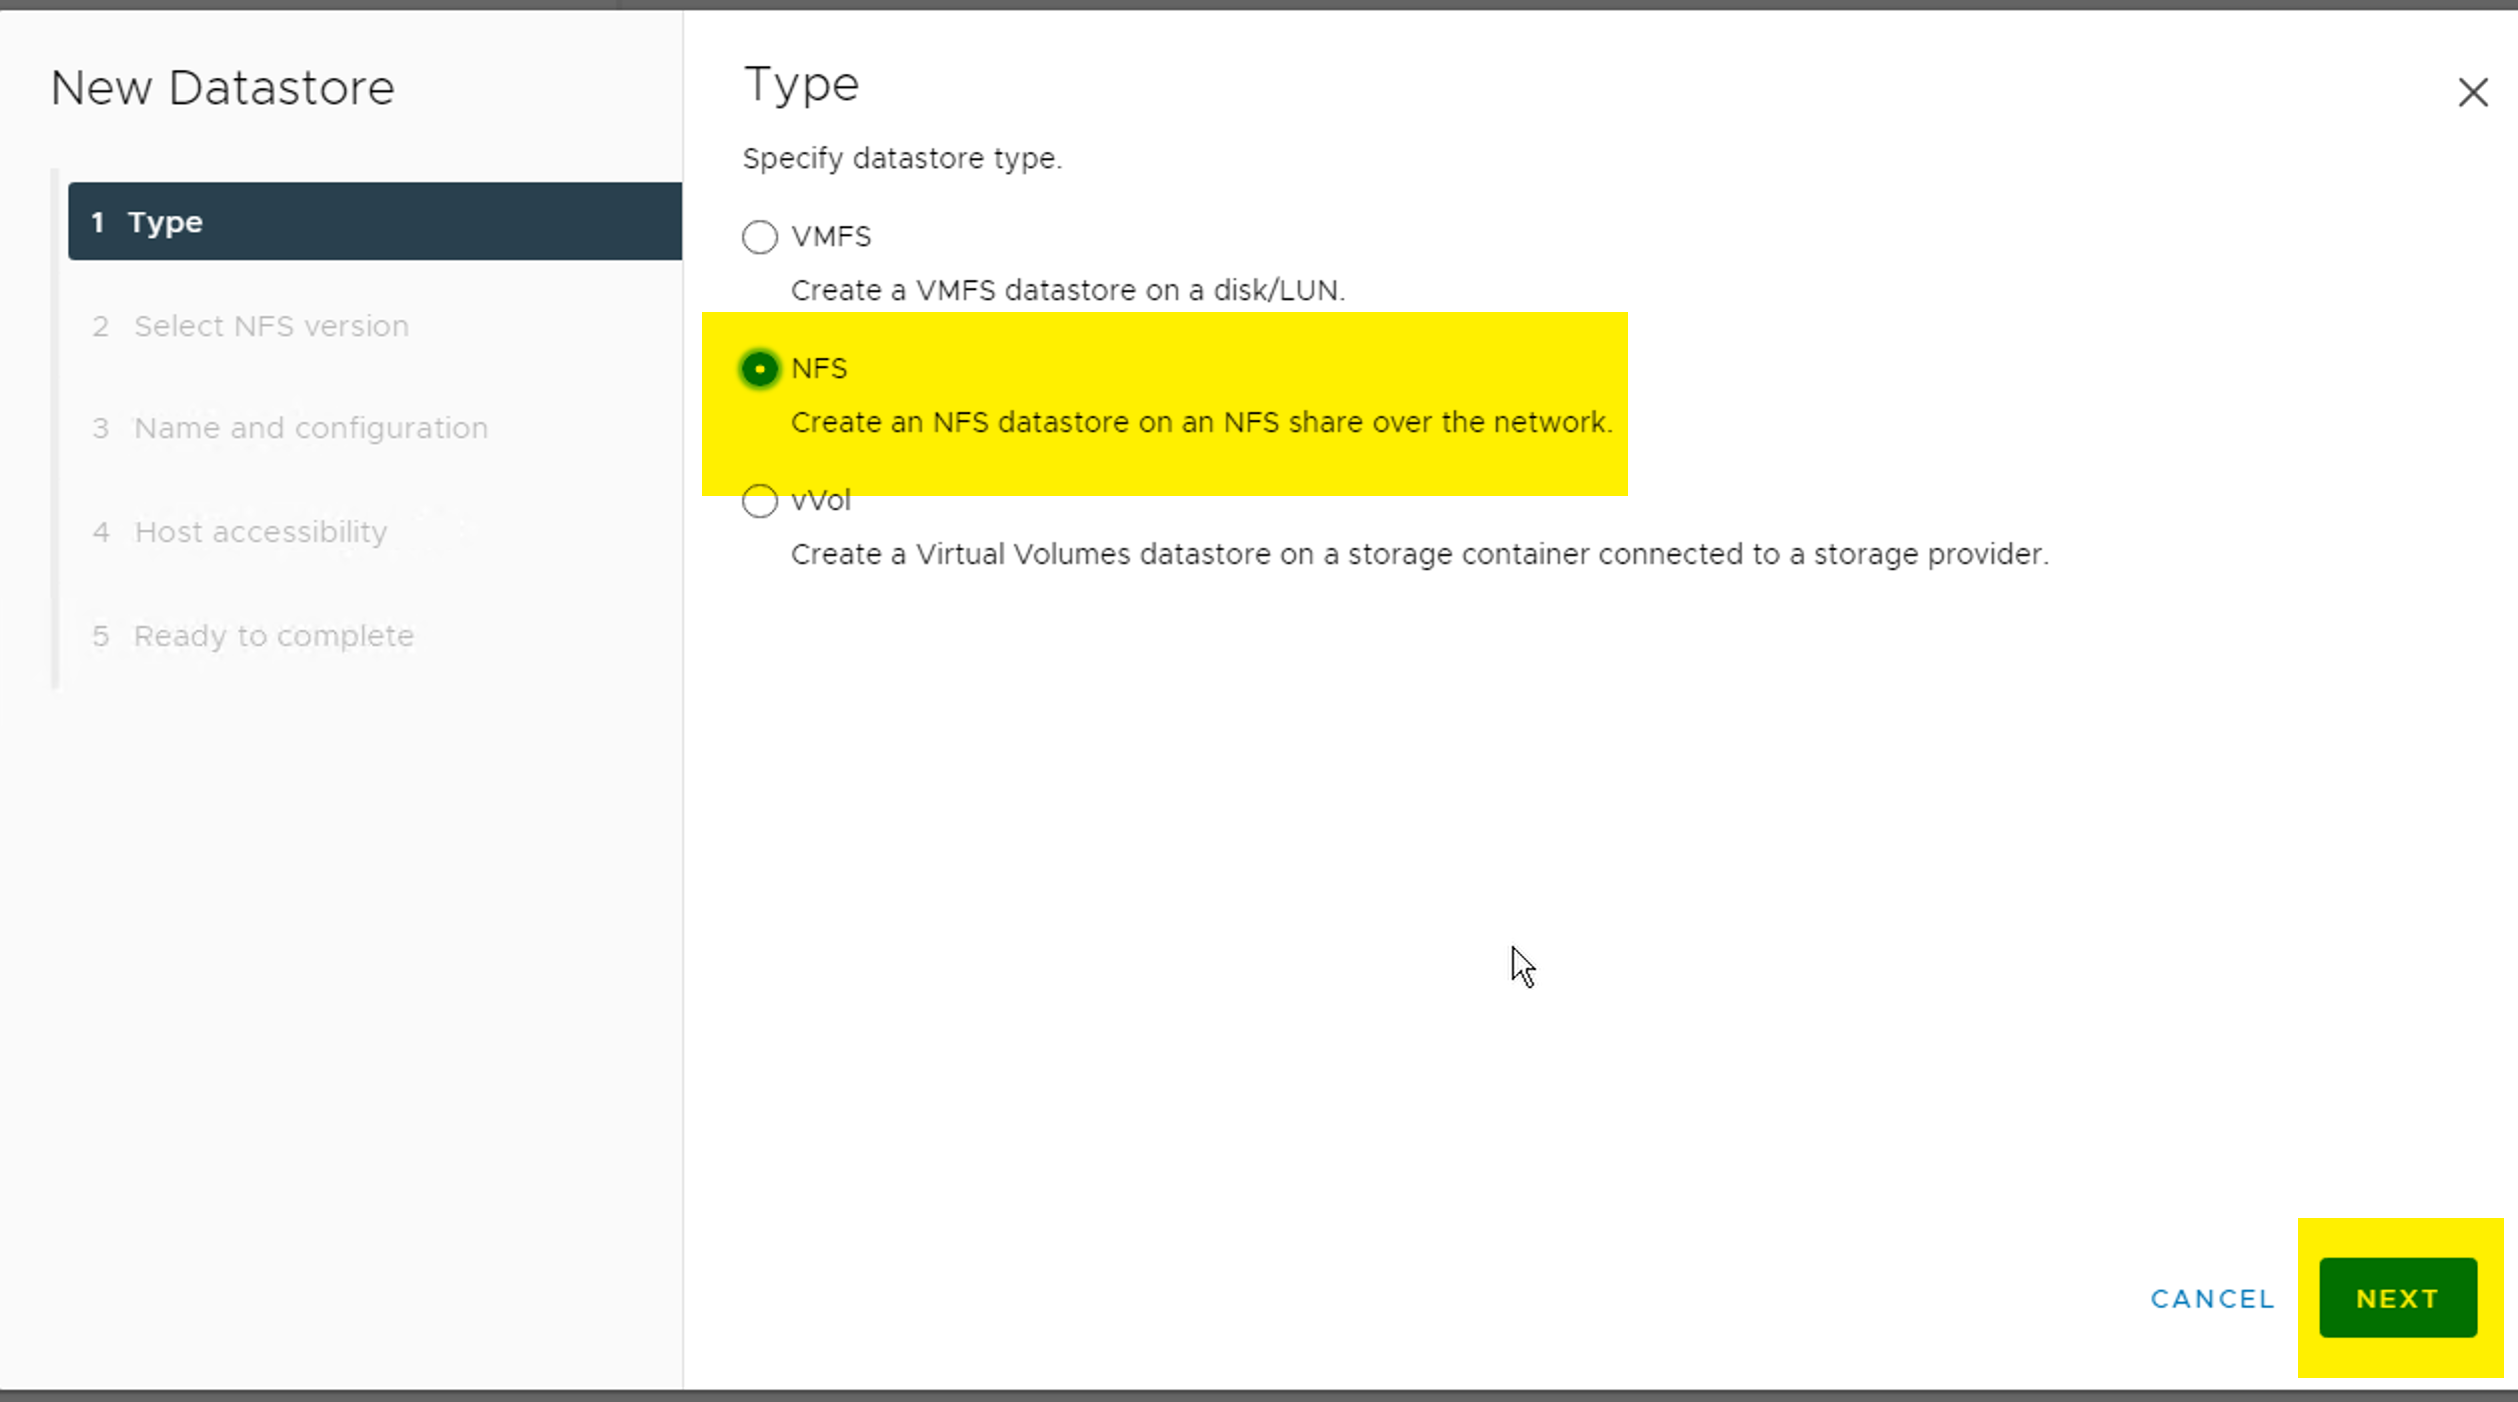
Select NFS -> click NEXT
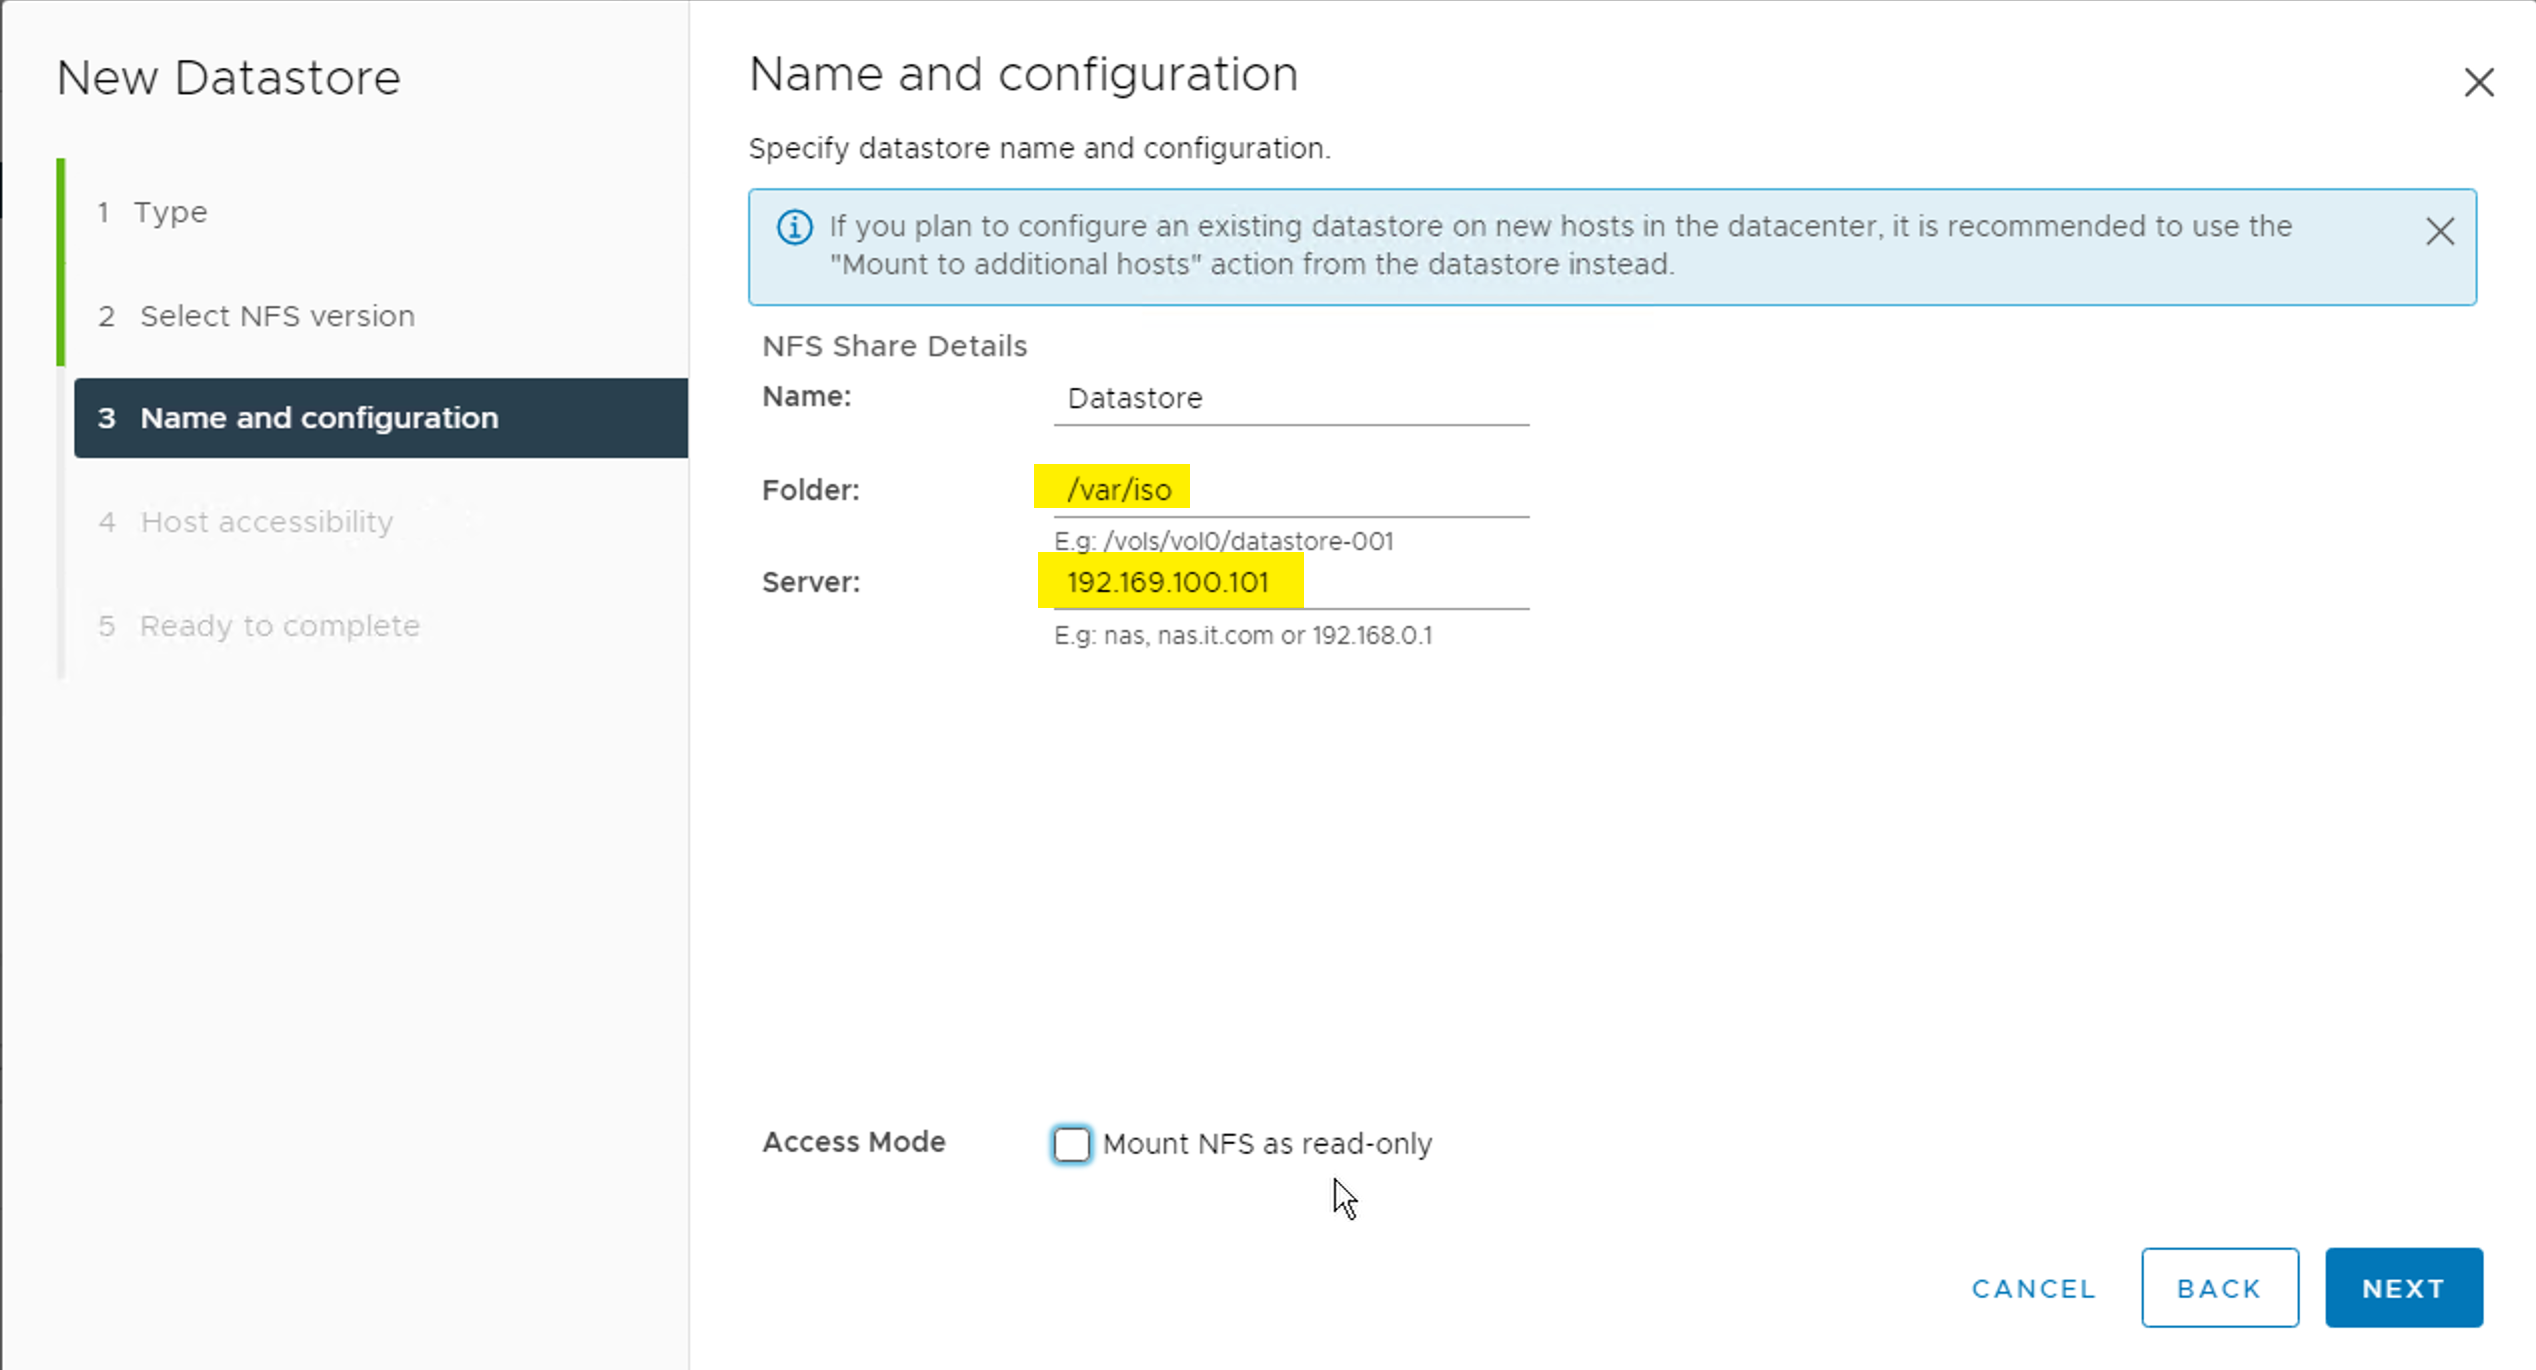
Enter the Name, Folder /var/iso and your NFS-Server IP address or FQDN -> click NEXT

Select the ESX Host where you want to provide the NFS Storage. Click NEXT
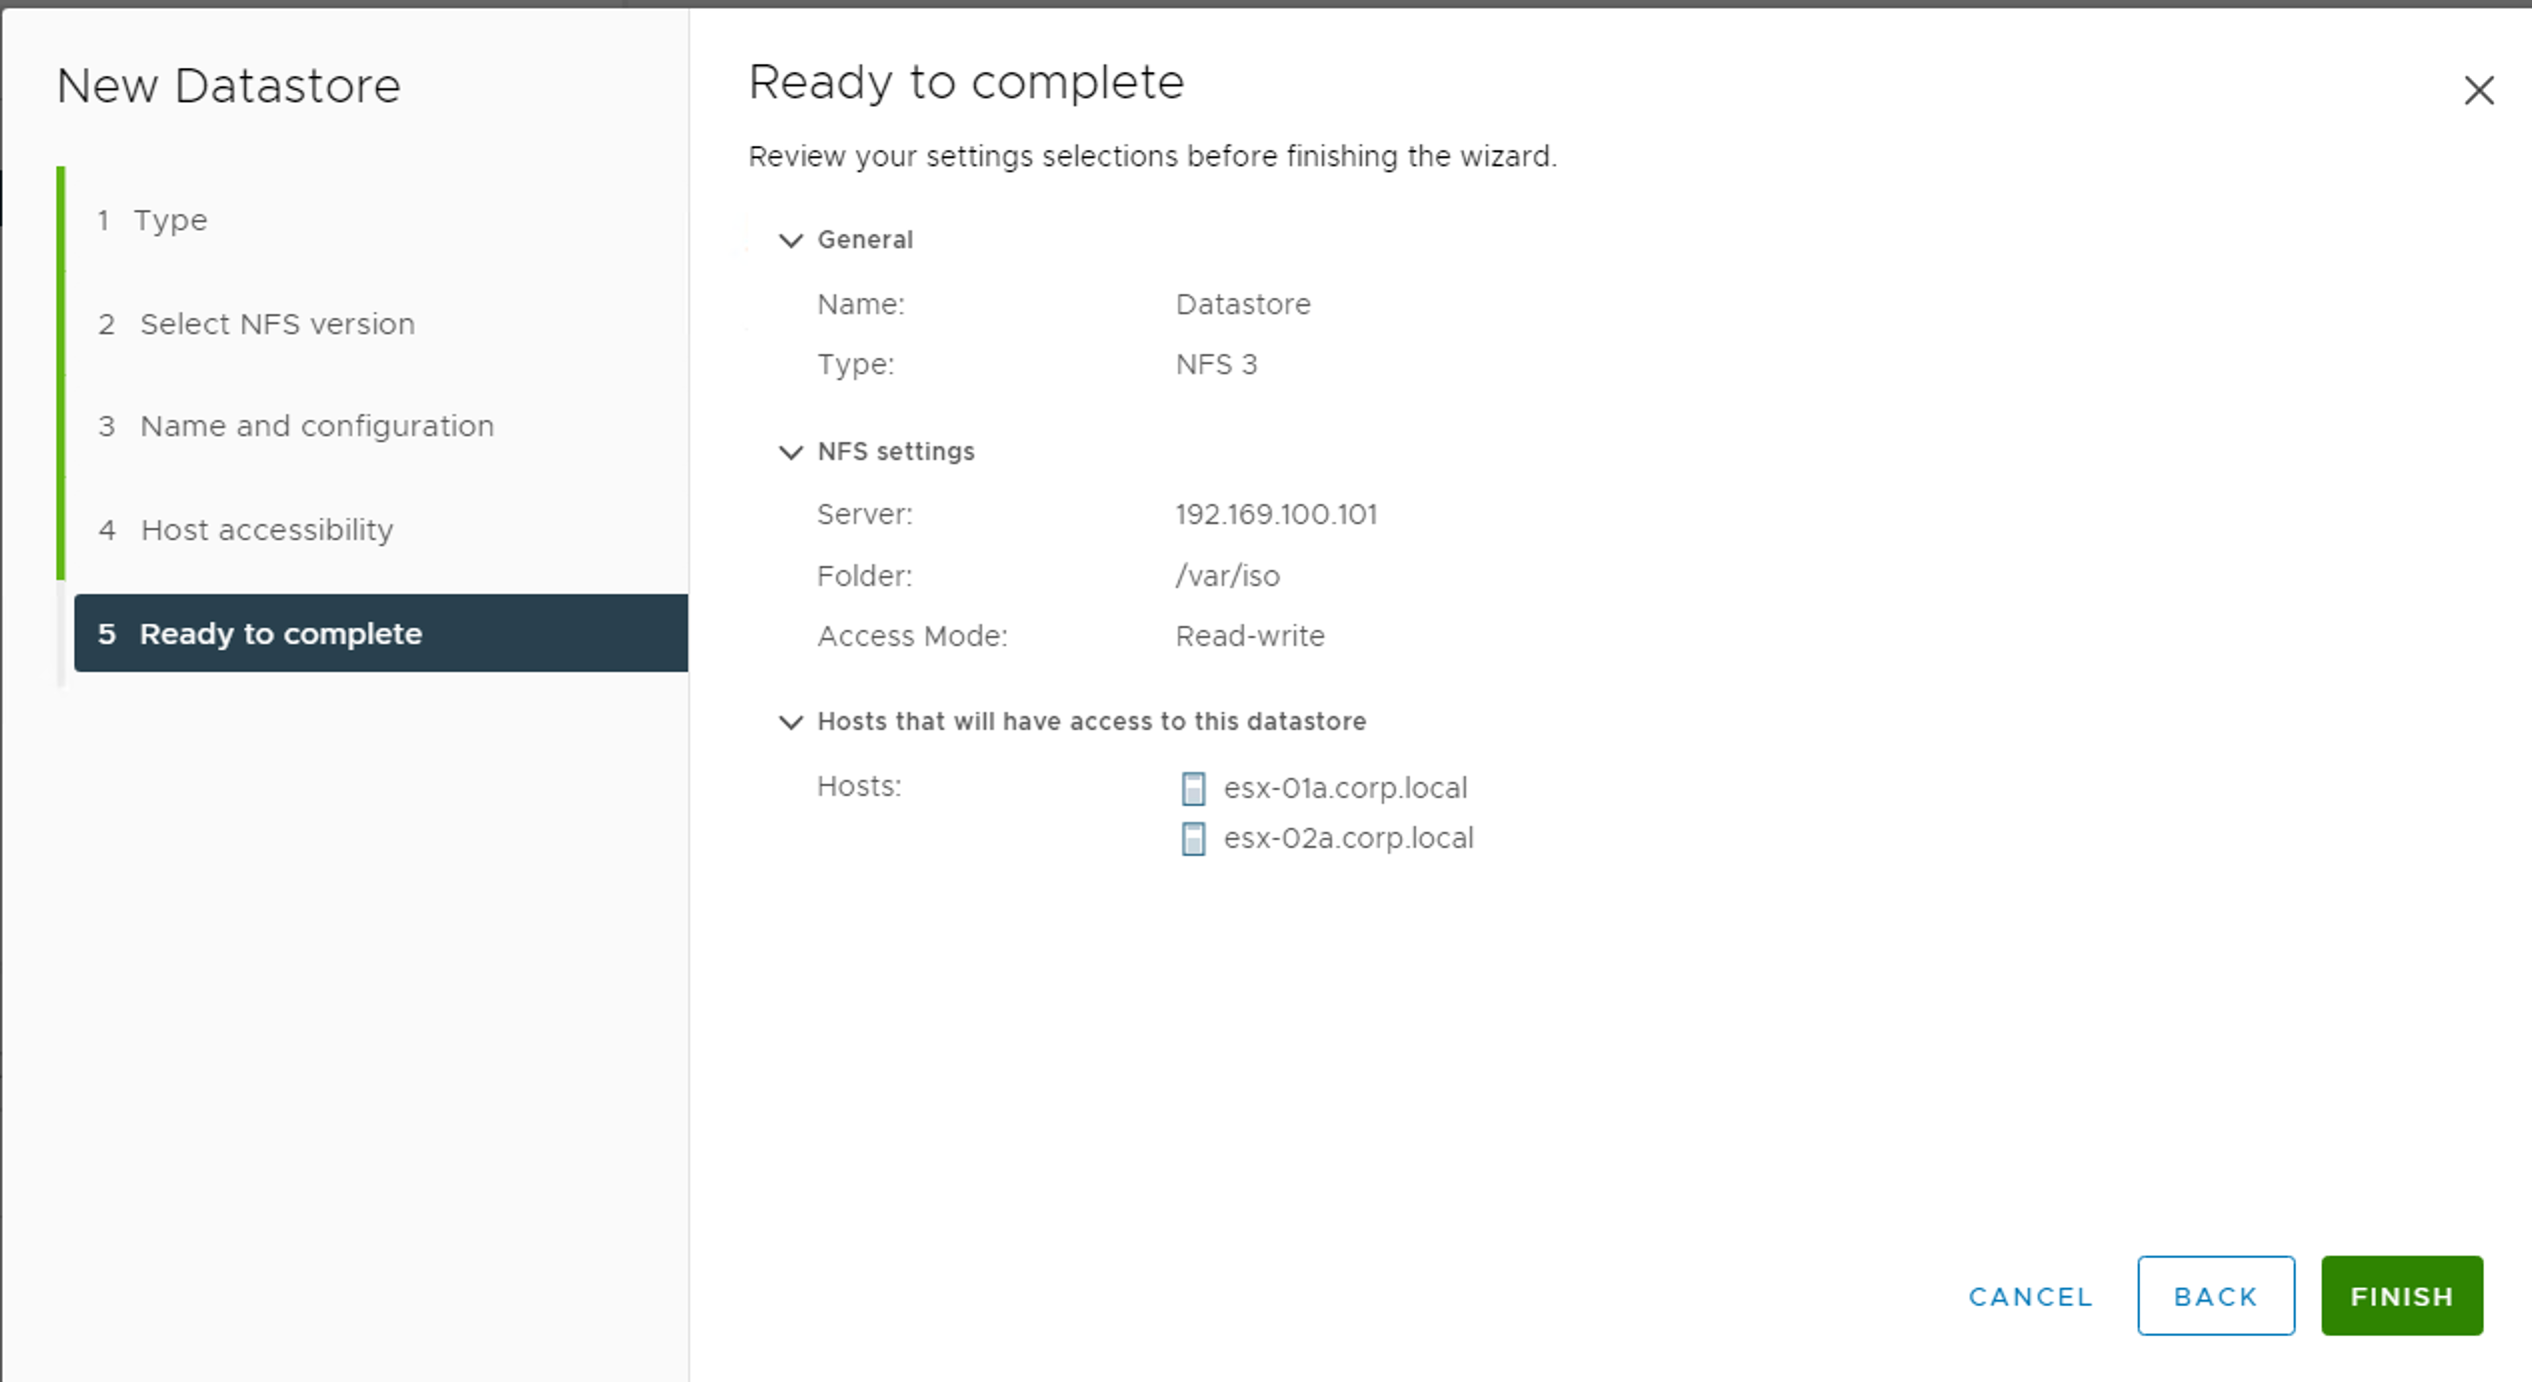
Click FINSIH
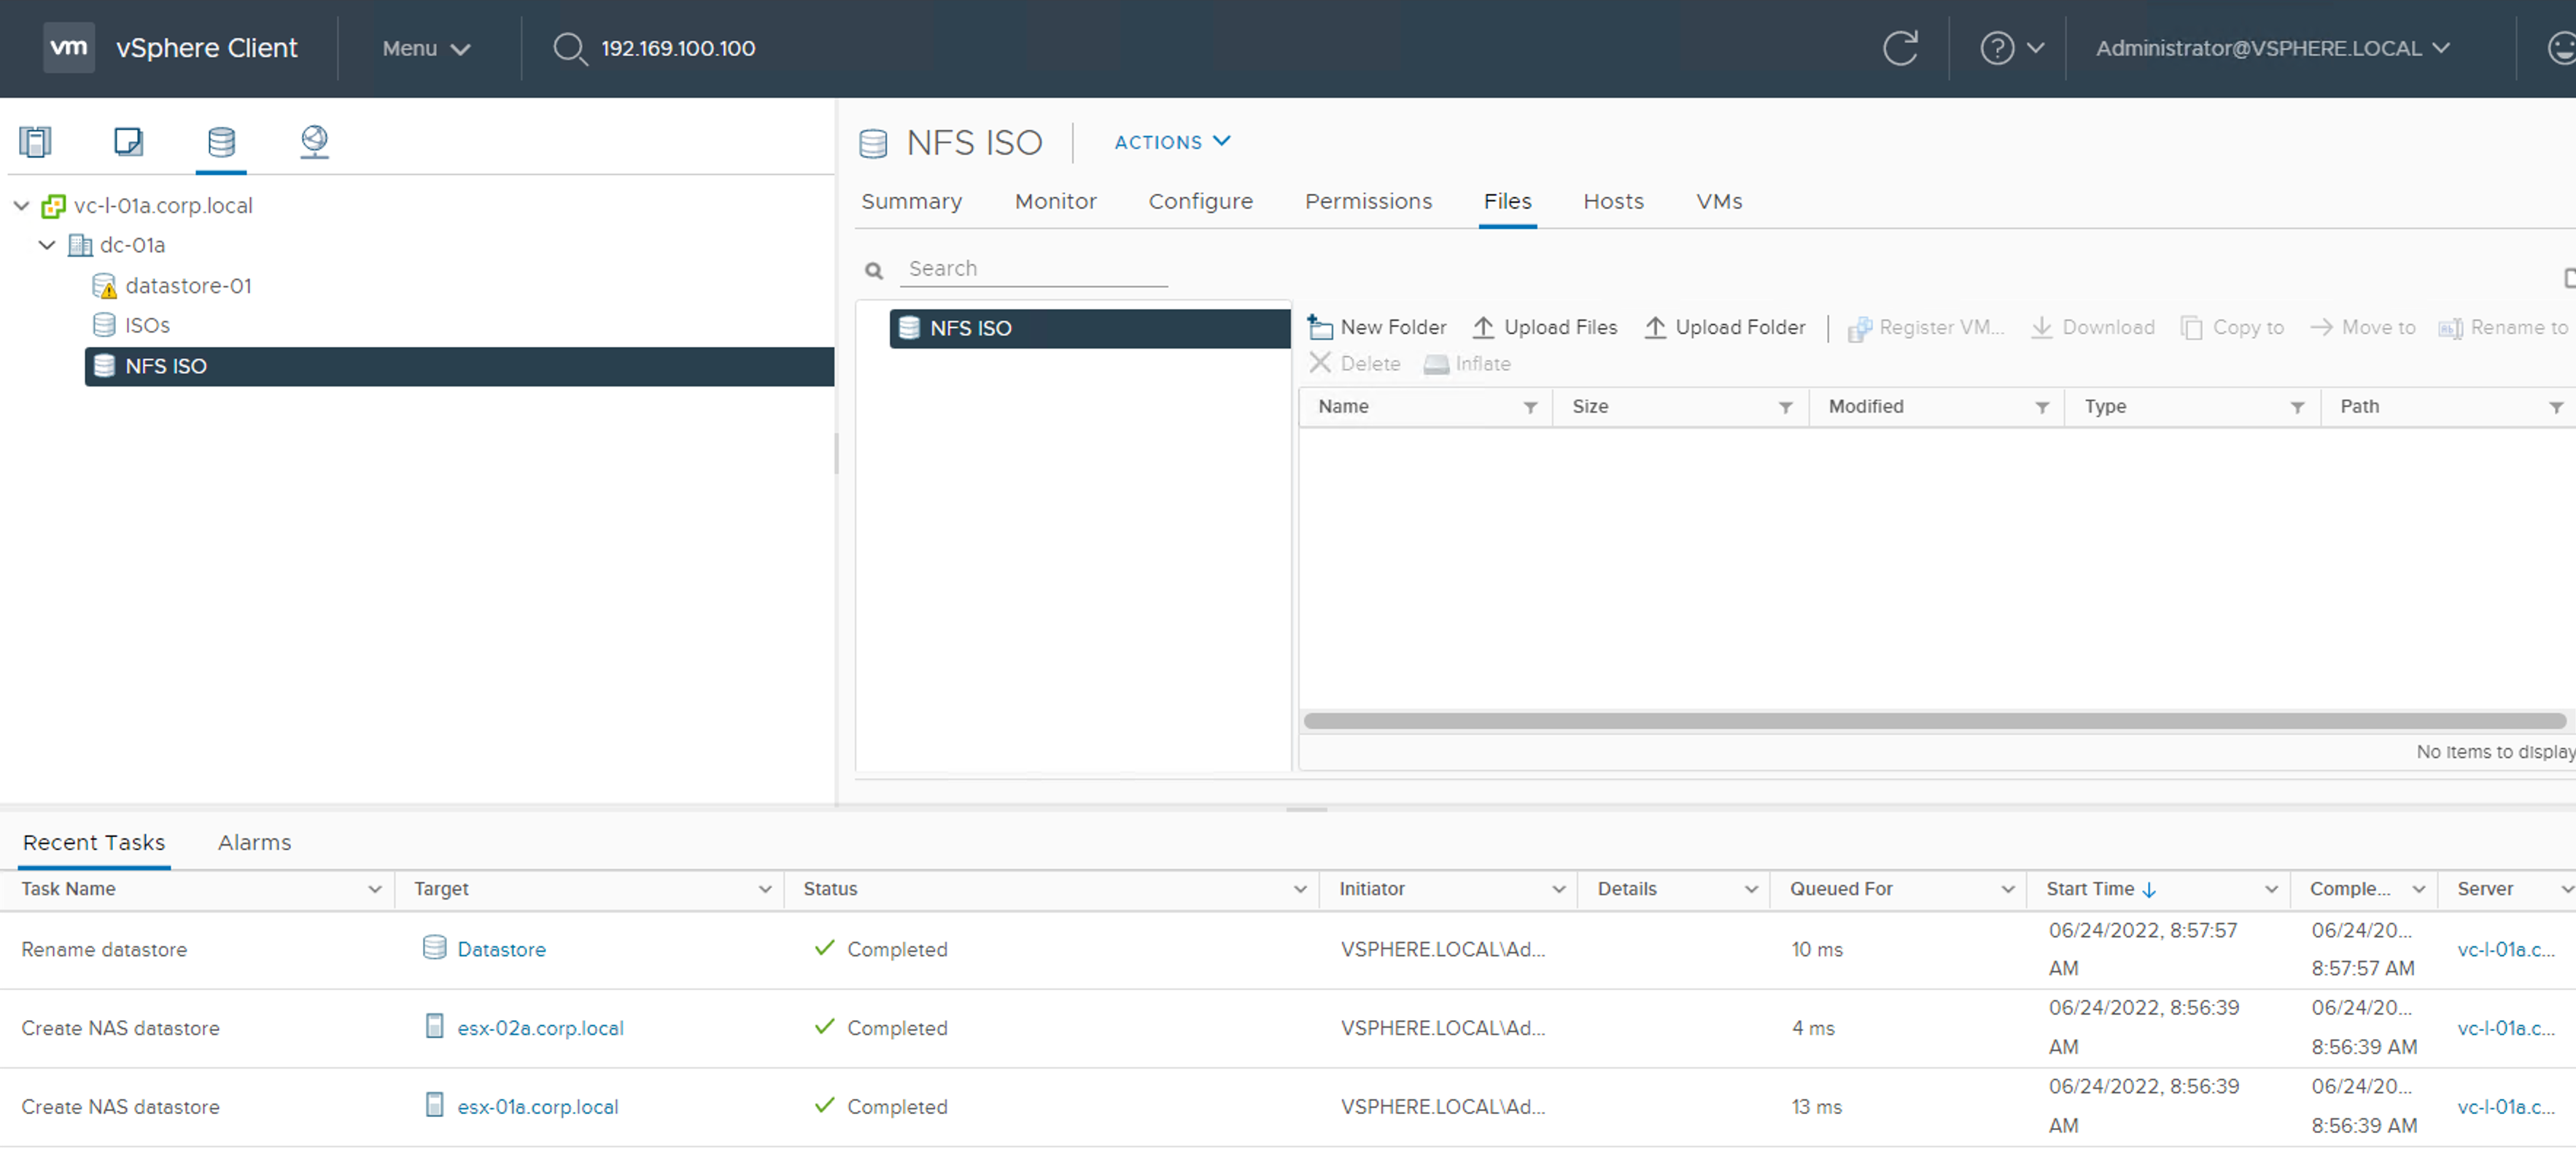
The datastore should now available on ESXi Hosts.