Mount an ISO-File to a VM with vRA 8 “Day 2 Operation”

This blog post describes how you can mount a ISO-File to a existing vRA 8 provisioned machine with a “Day 2” Operation. This solution is using a vRealize Orchestrator Workflow and a NFS share where the ISO-Files are stored. How you can configure a NFS Server on Ubuntu 20.04 based OS is described here and how you can create your own ISO-Uploader Web page is described here.
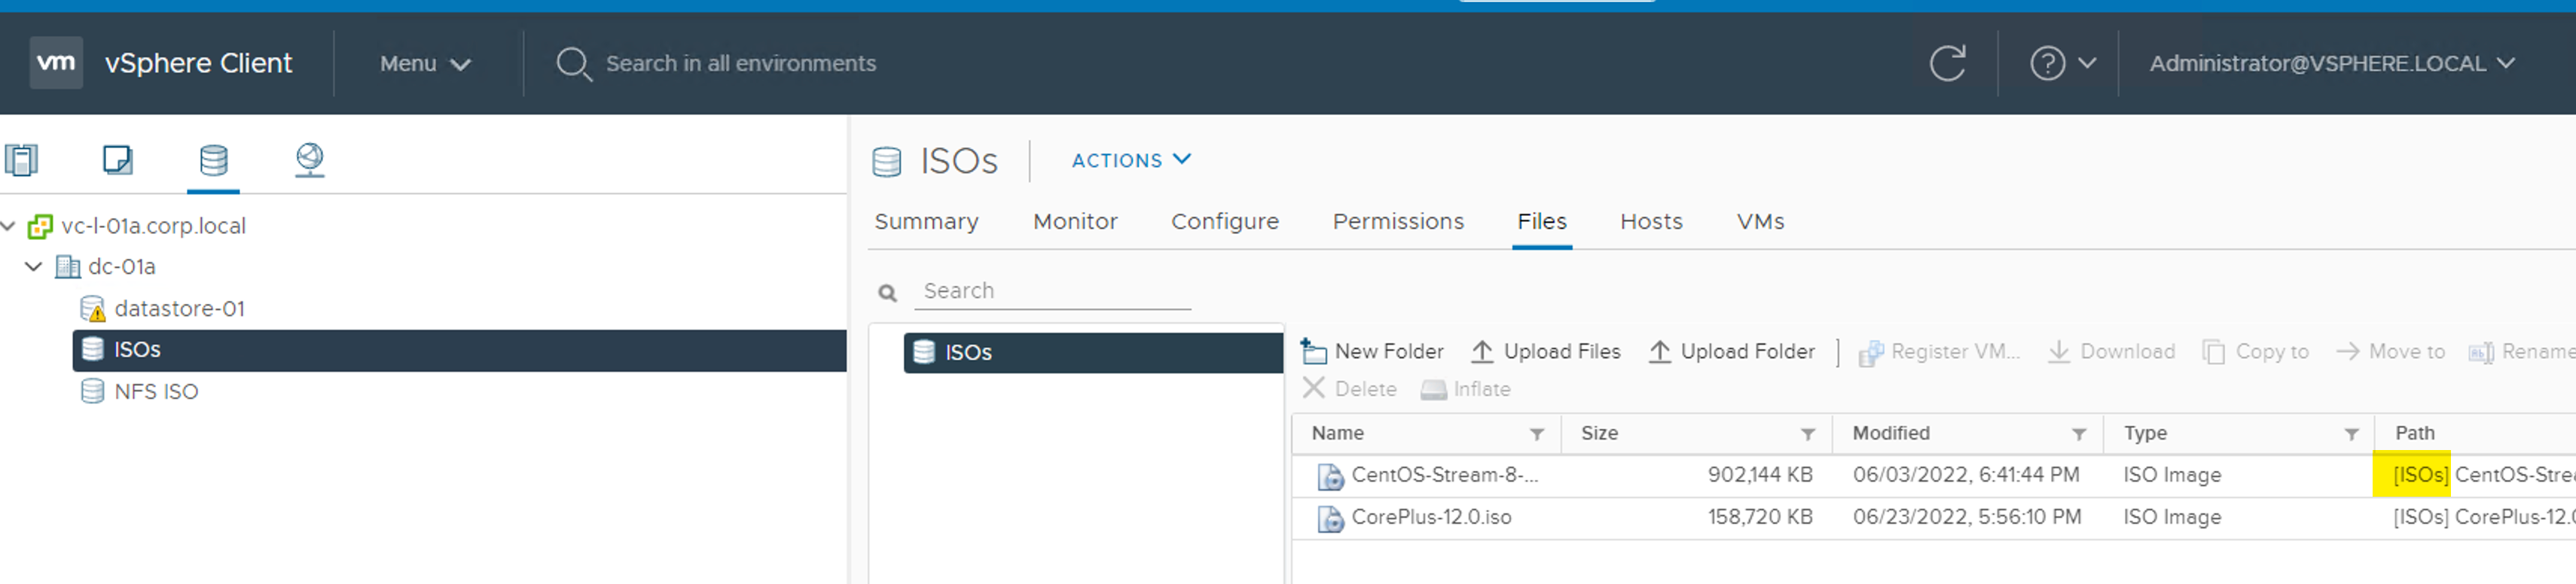
Prerequisites

  • Installed and configured NFS Storage on ESX i
  • vRA 8 configured and installed
  • A vRA provisioned VM
  • vCenter Plugin with connected vCenter where the NFS Storage is connected

The vRealize Workflow package can be download below
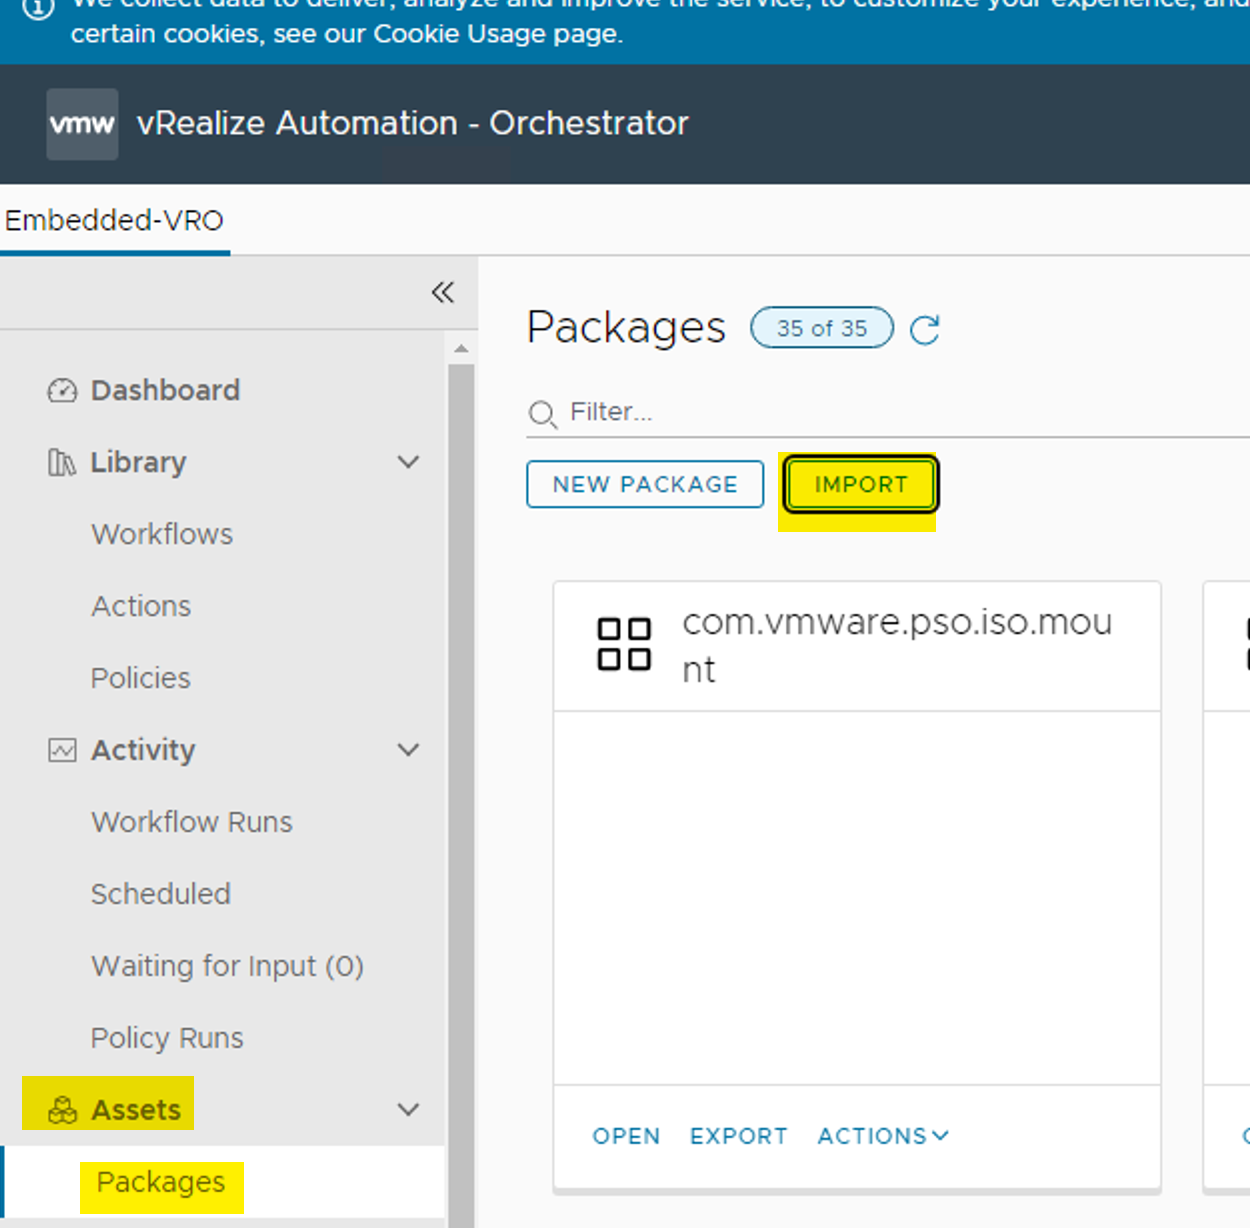
Import the package

  • Login into vRealize Orchestrator
  • navigate to Assets -> Packages
  • click on IMPORT
  • Select the previous downloaded package
  • Import it

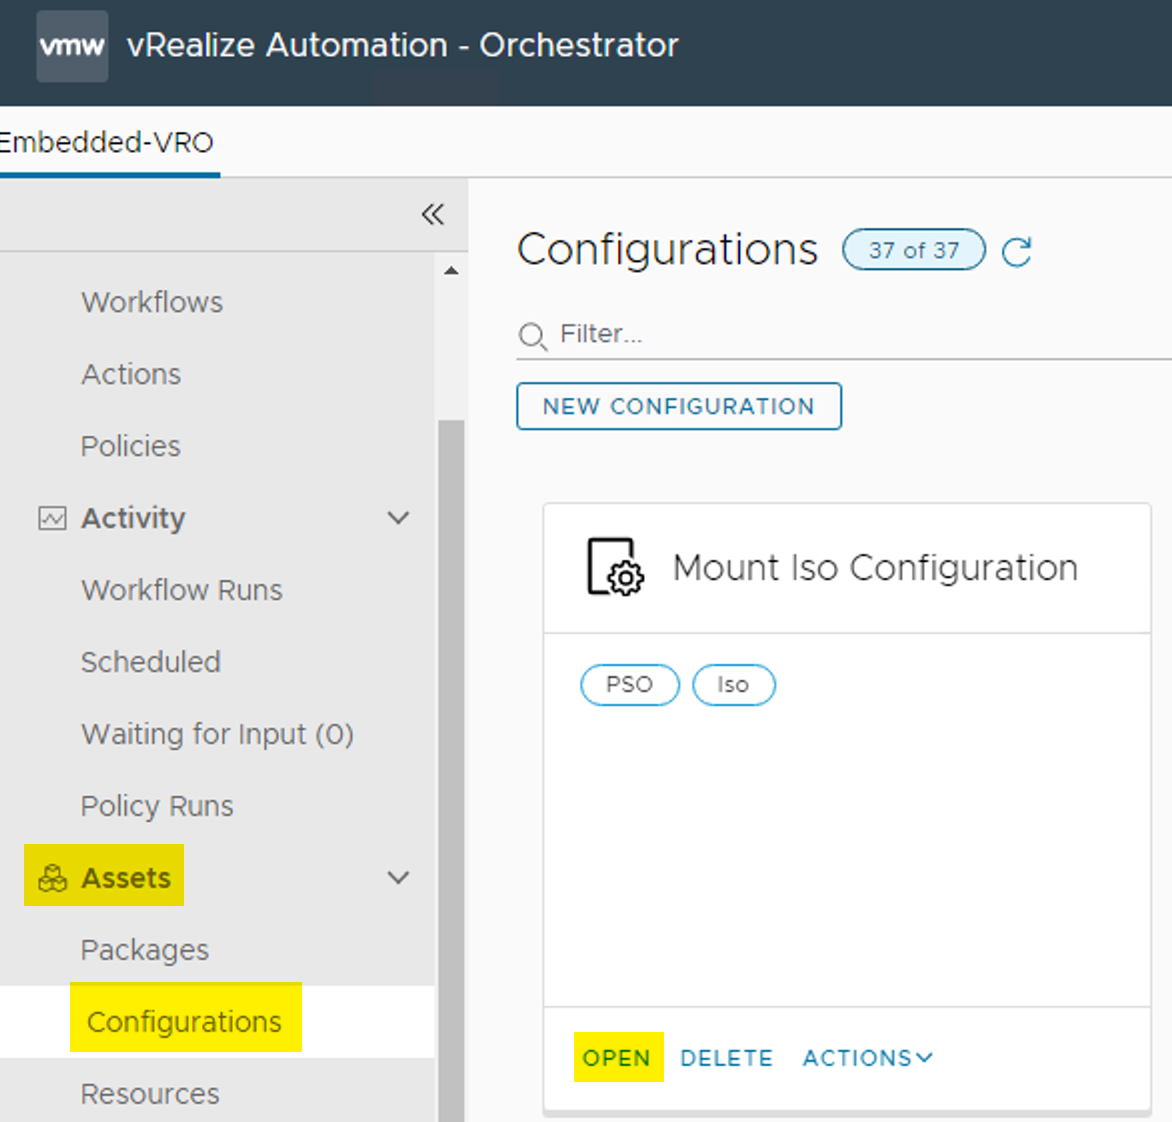
Set the Configuration Element variables

  • Navigate to Assets -> Configurations
  • Open the Mount Iso Configuration
  • Navigate to Variables
  • Set the Datastore vCenter Object (NFS Storage) where your ISO-Files are stored
  • Set the nfsPath (That is the name of the storage)
This is the path where must stored in the vRO Configuration Element under nfsPath

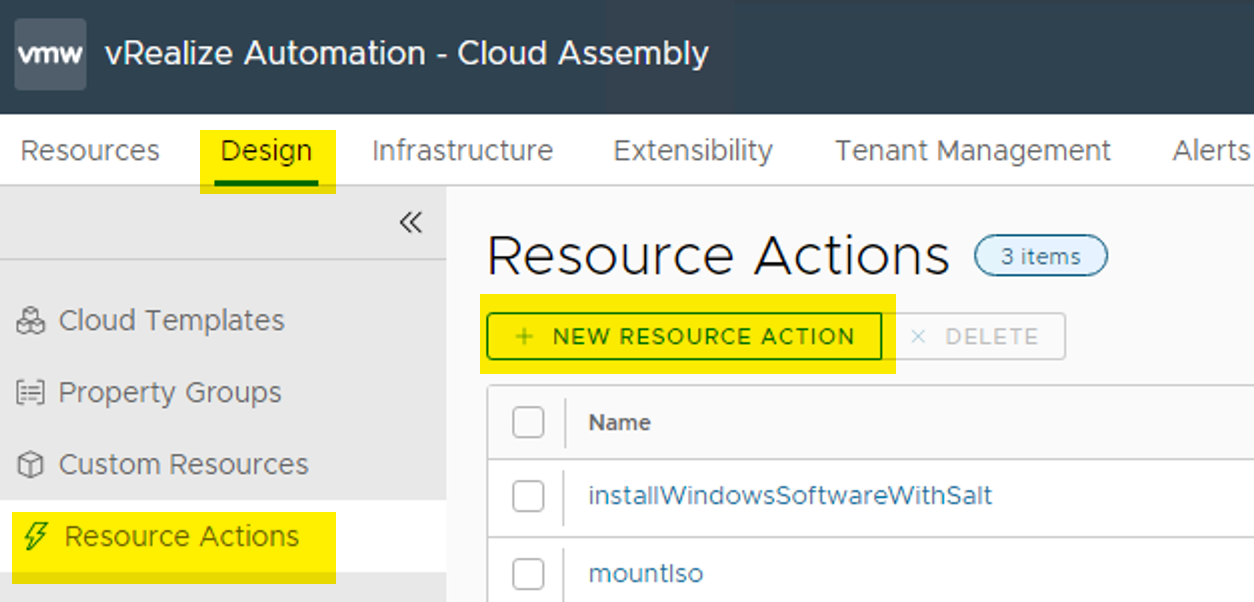
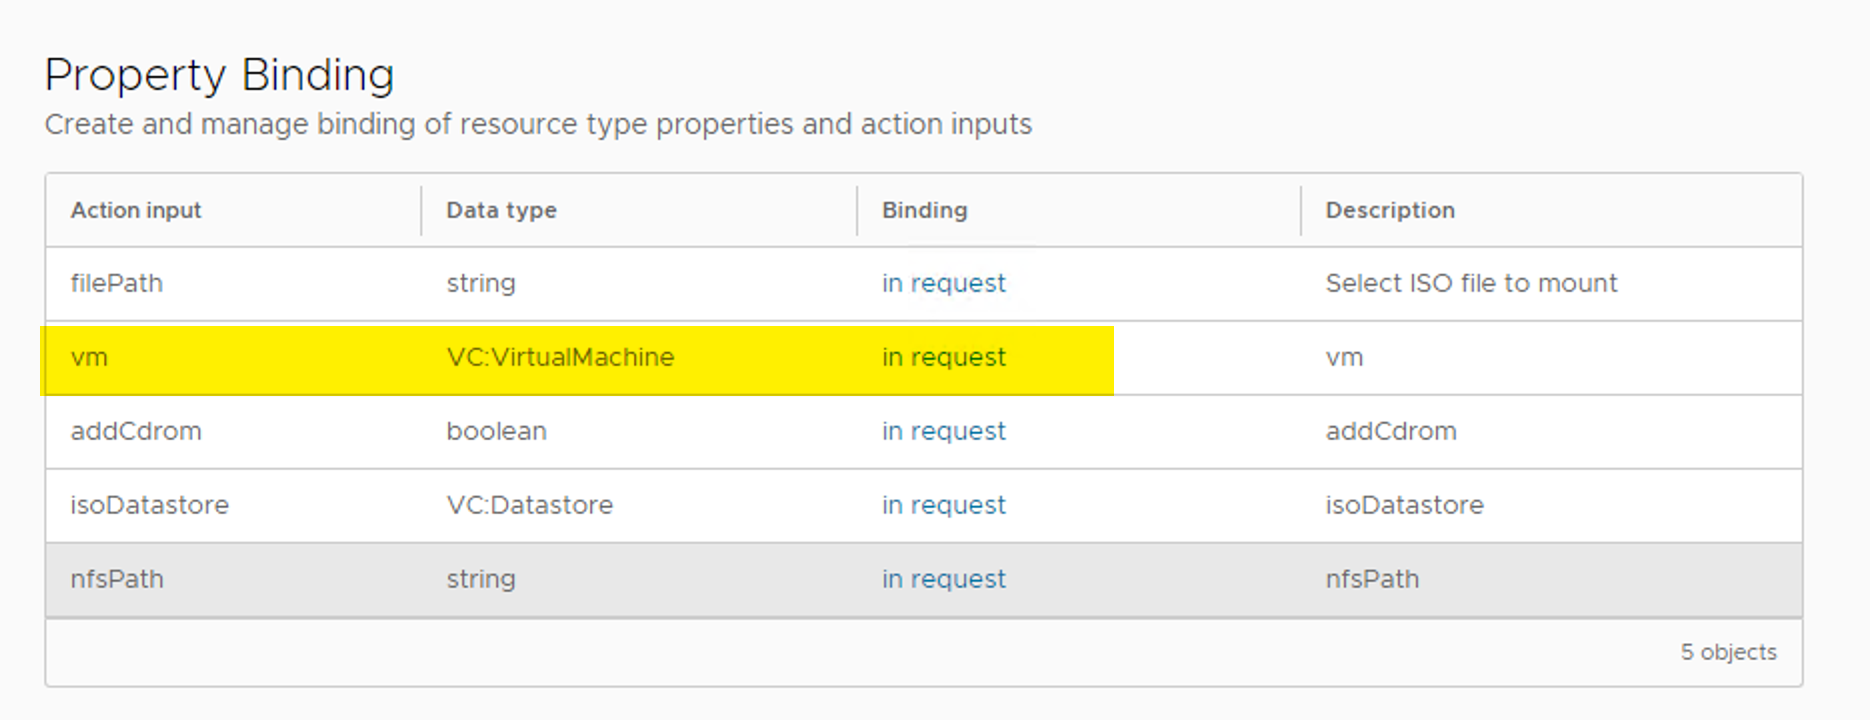
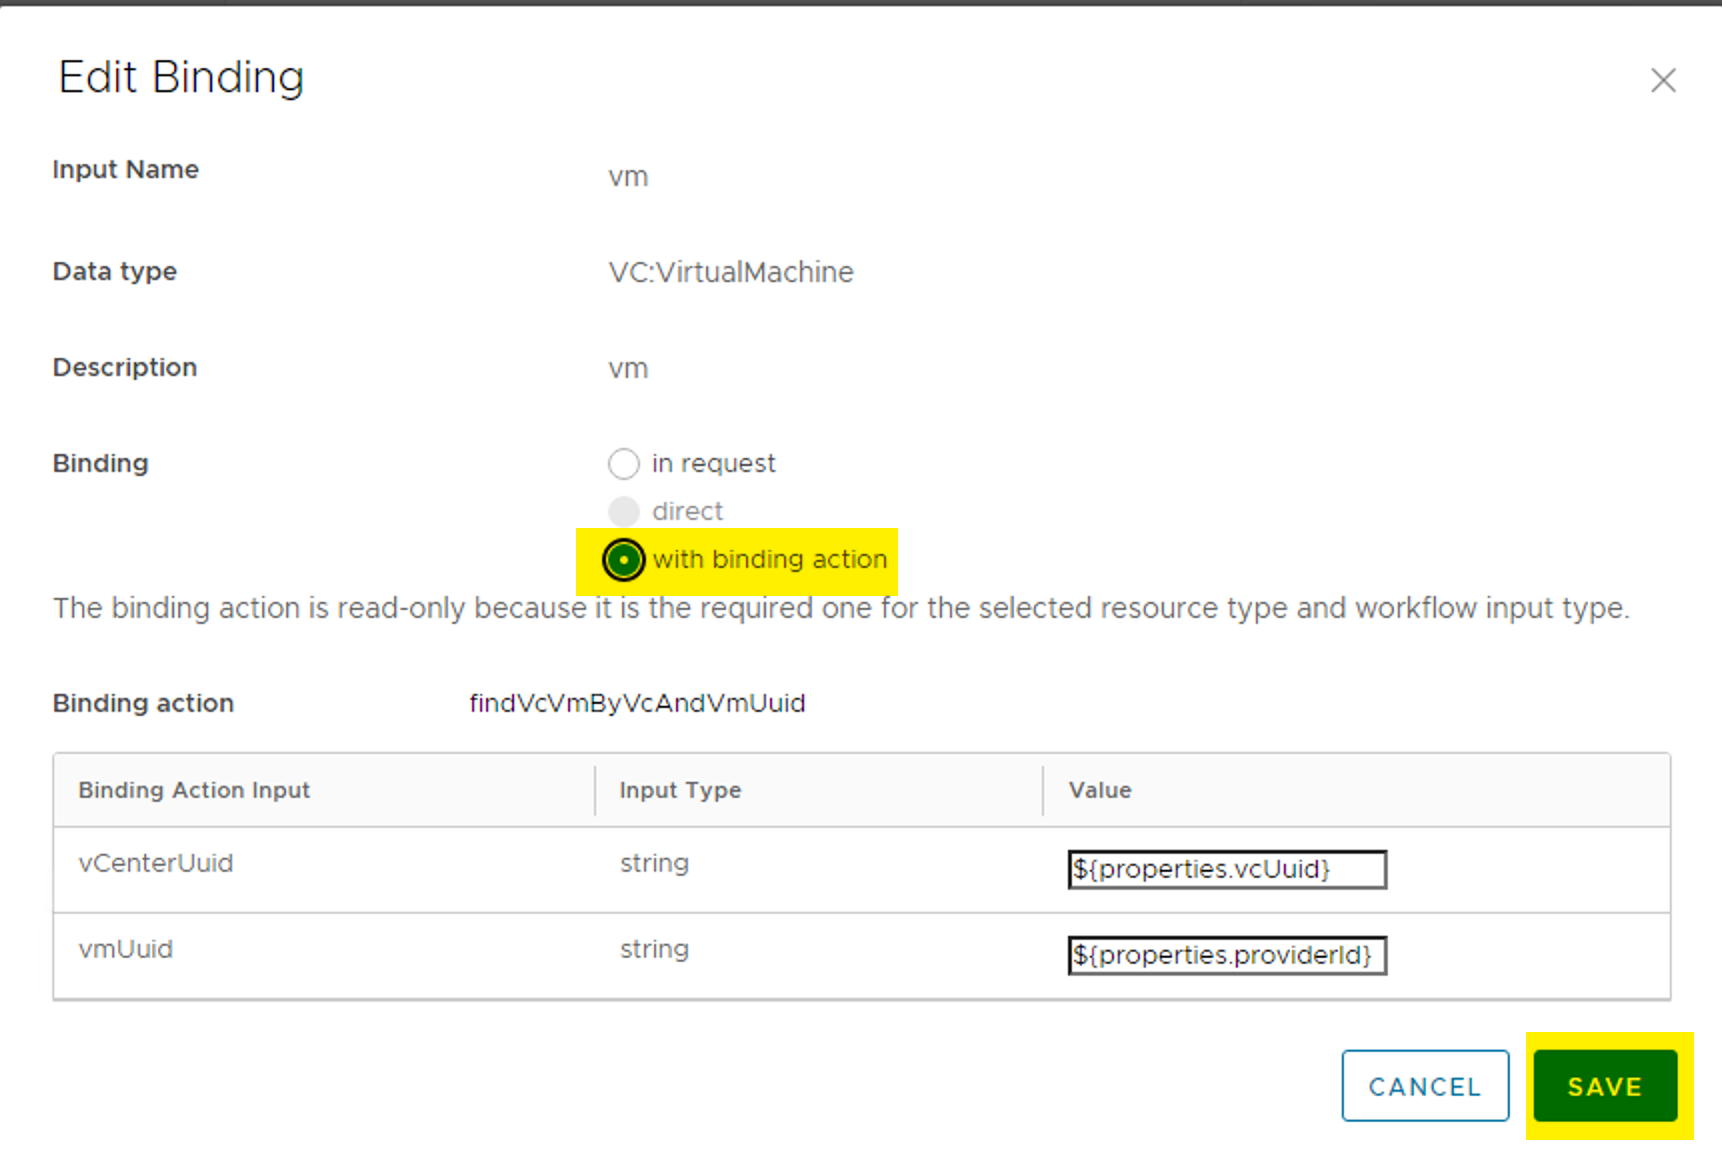
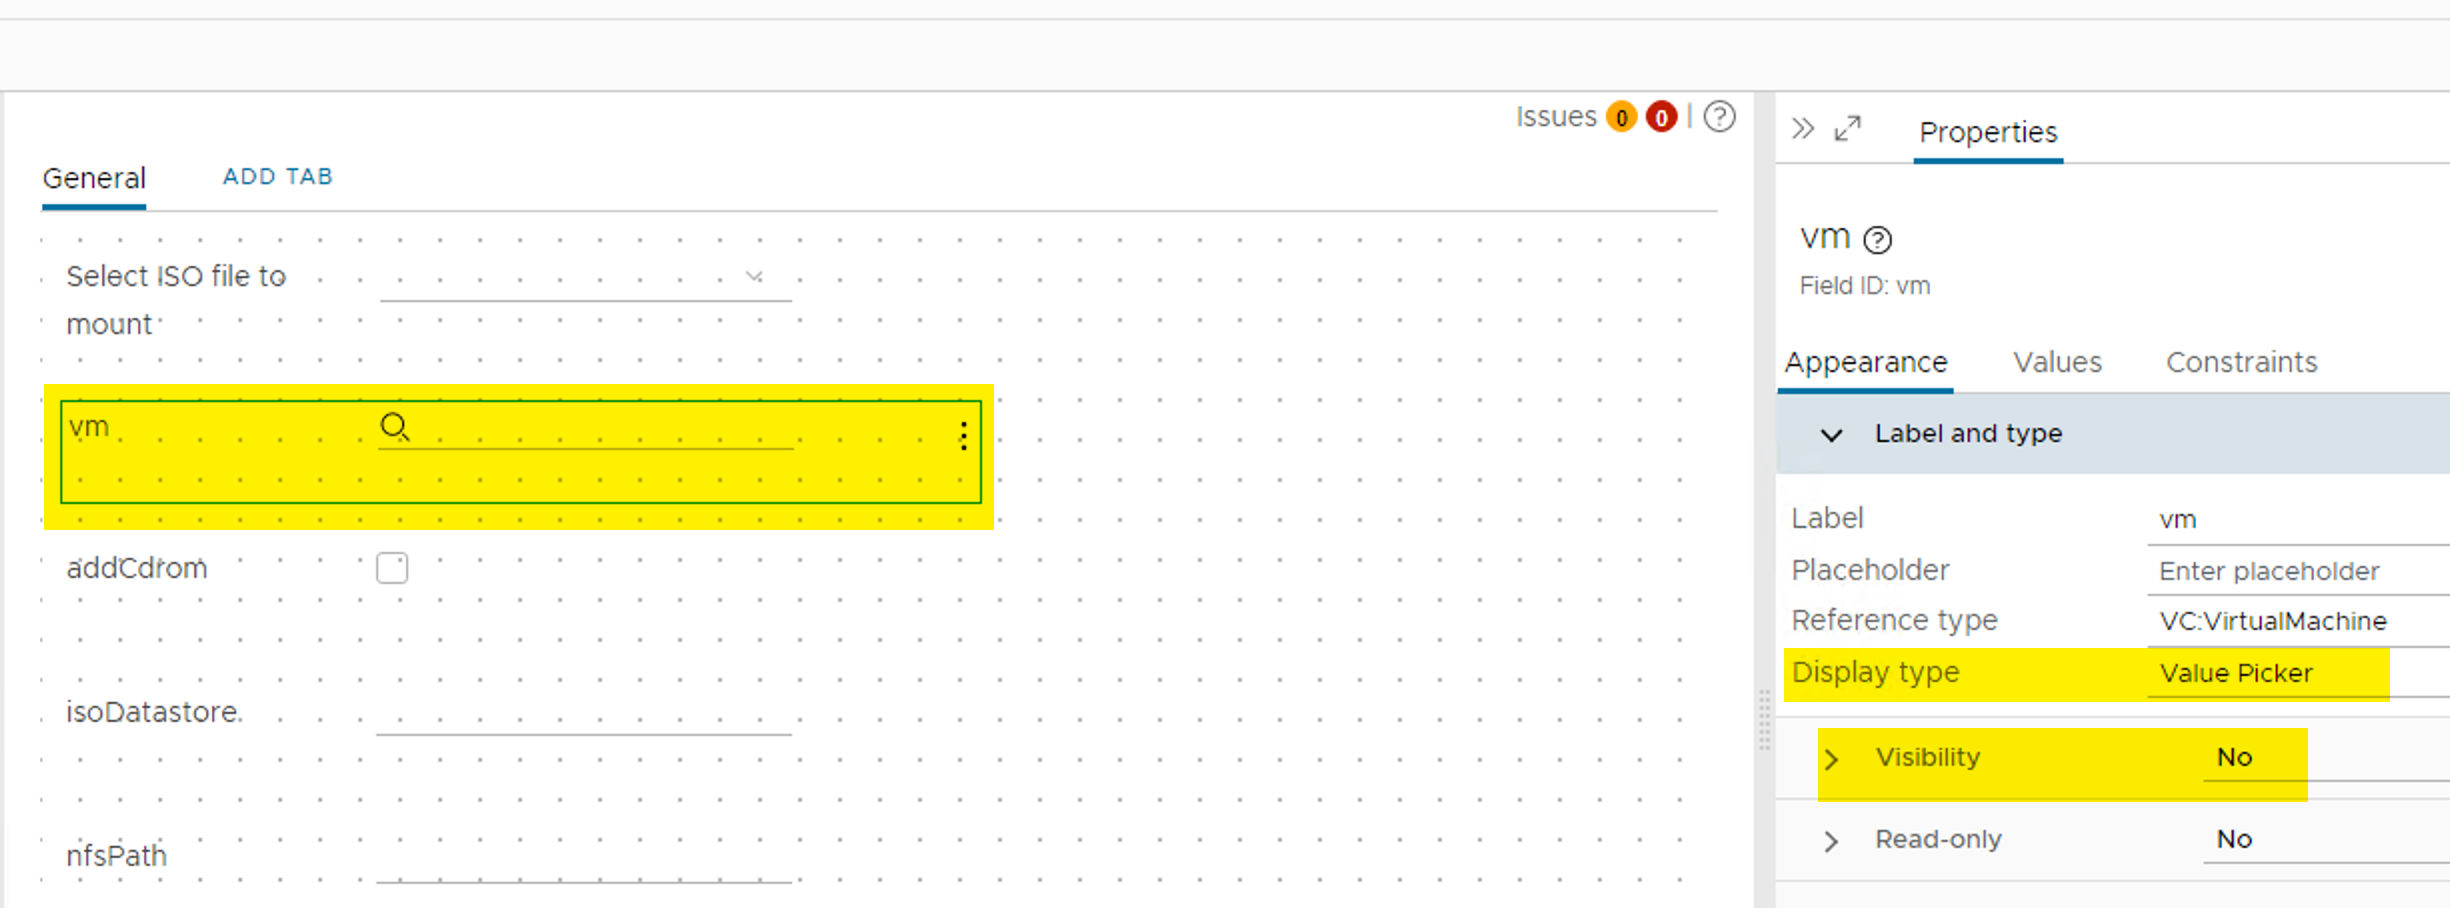
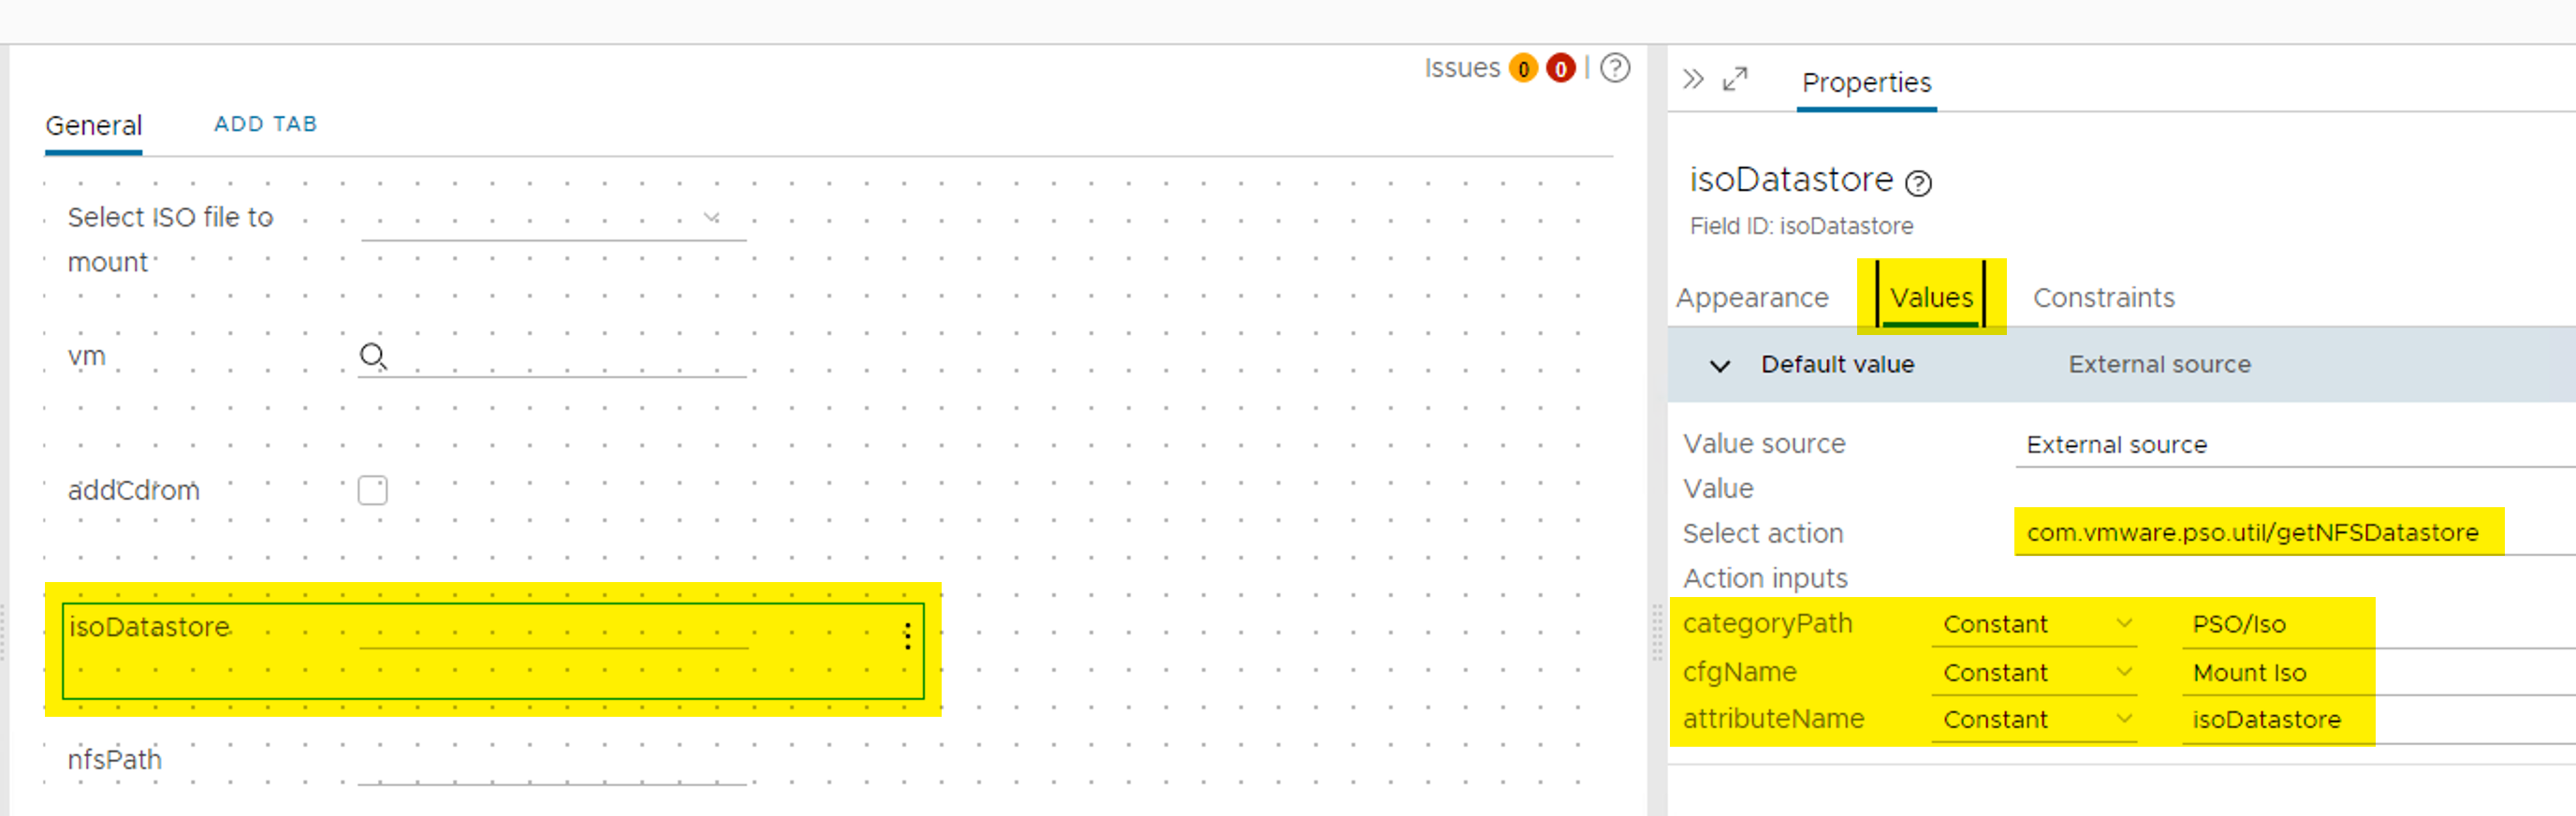
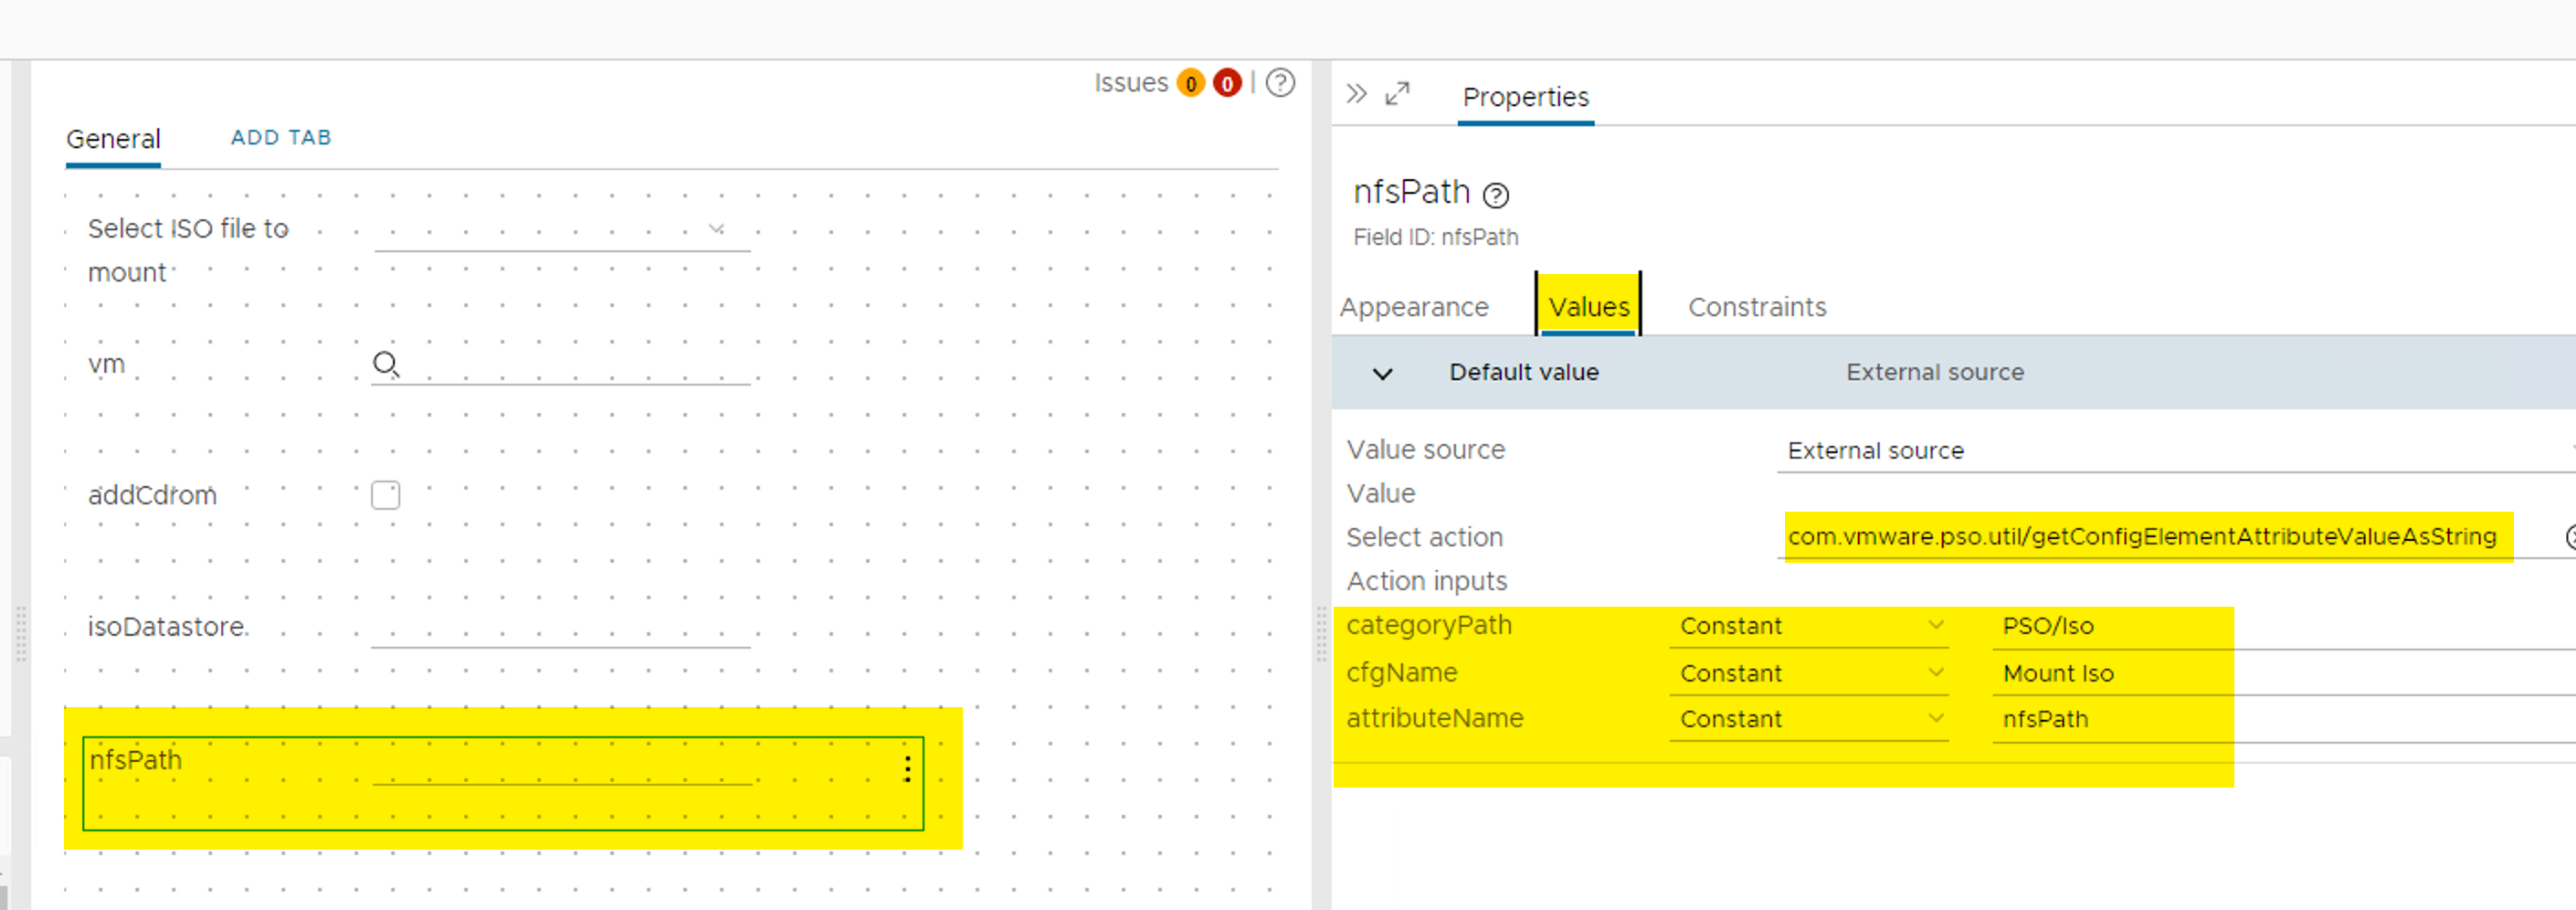
Create a resource Action in vRA 8
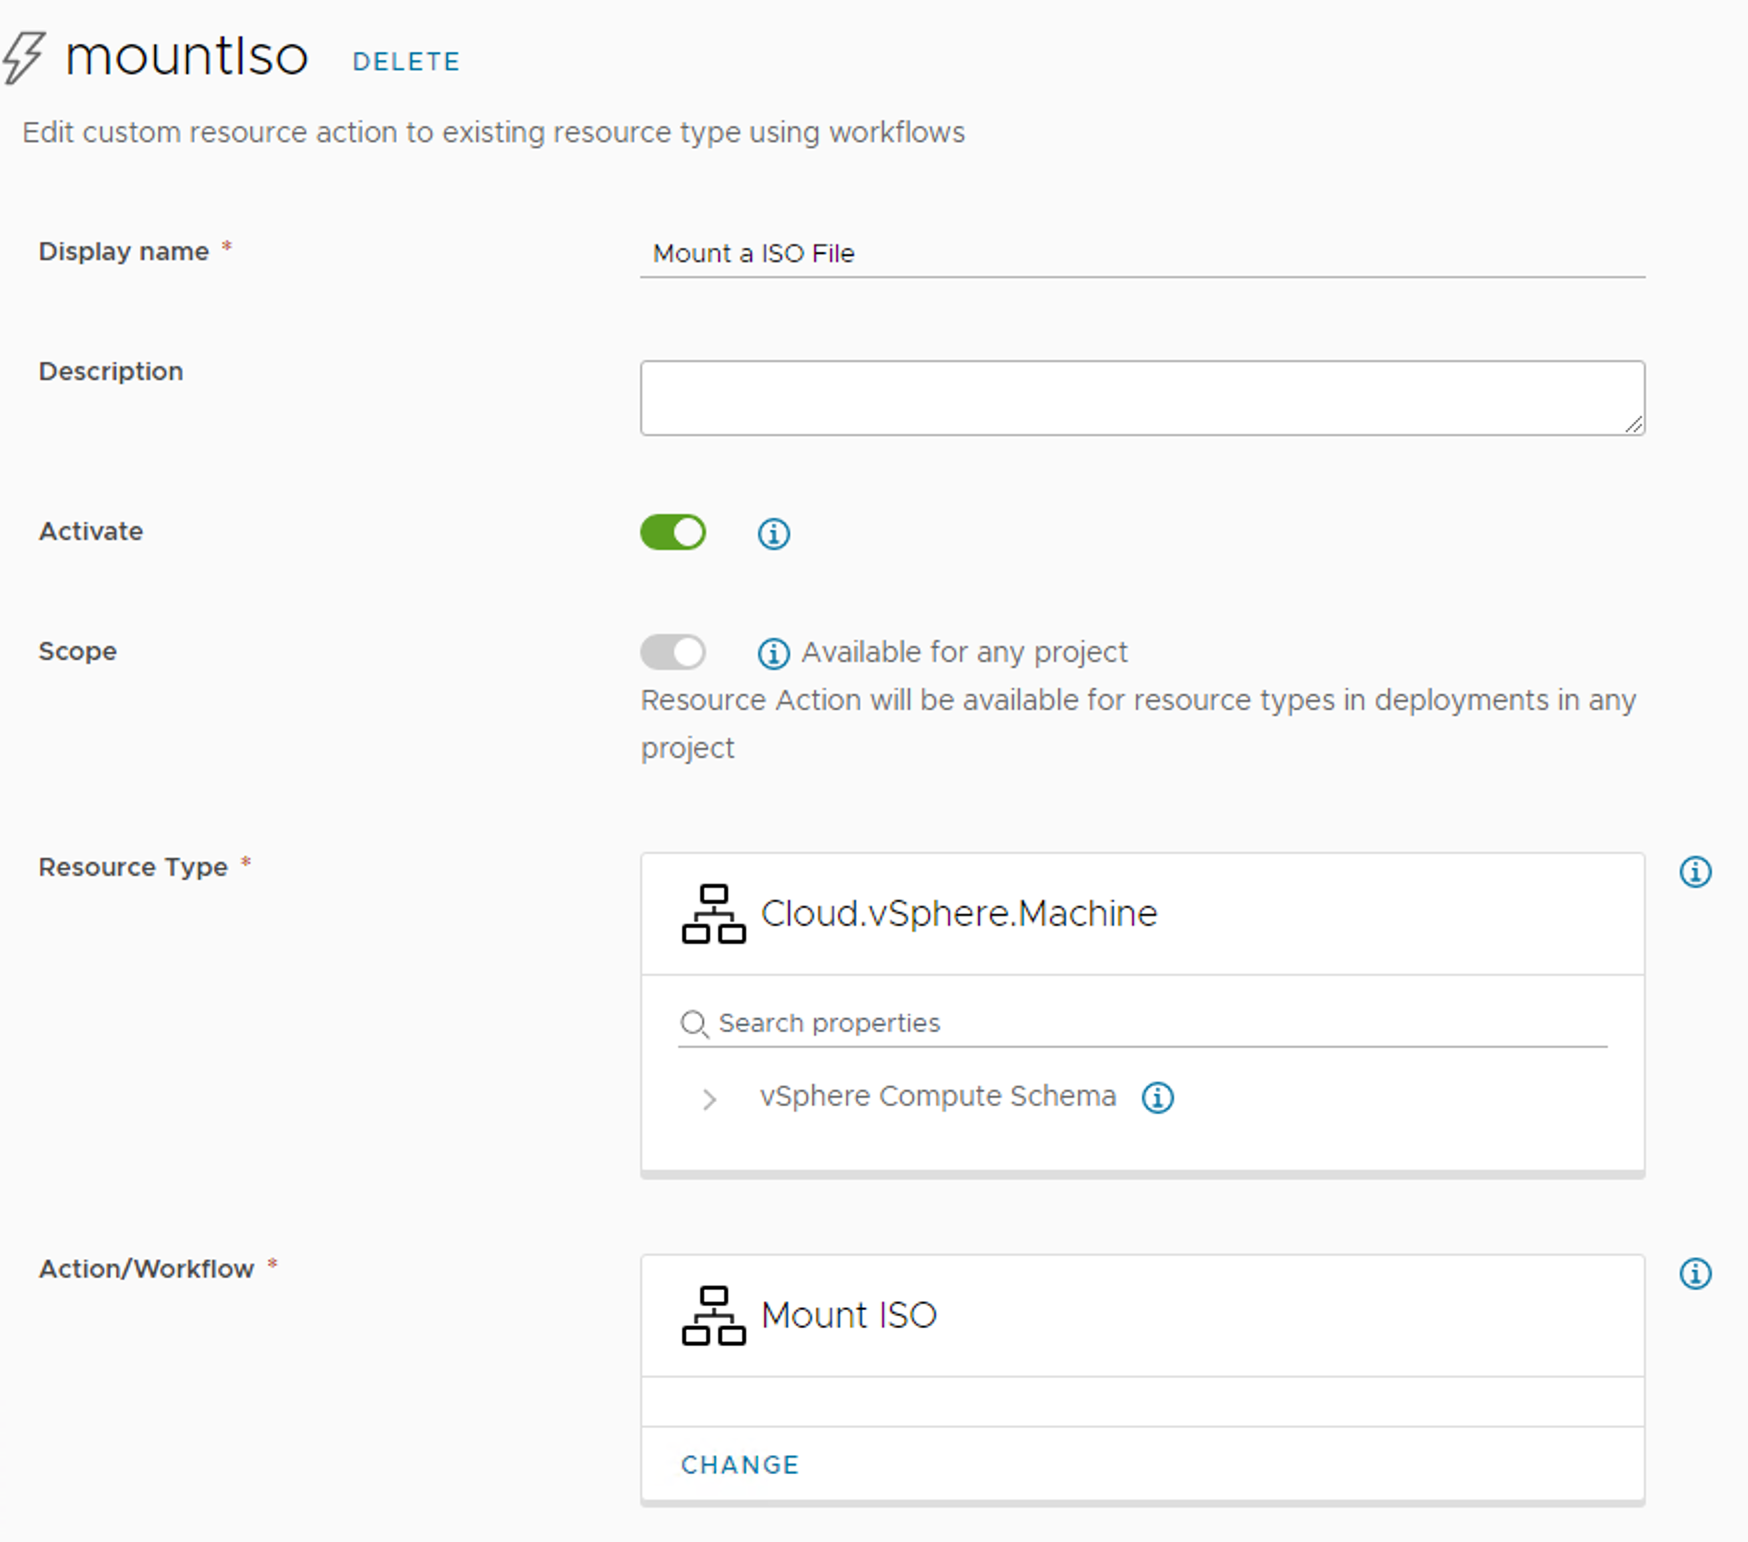
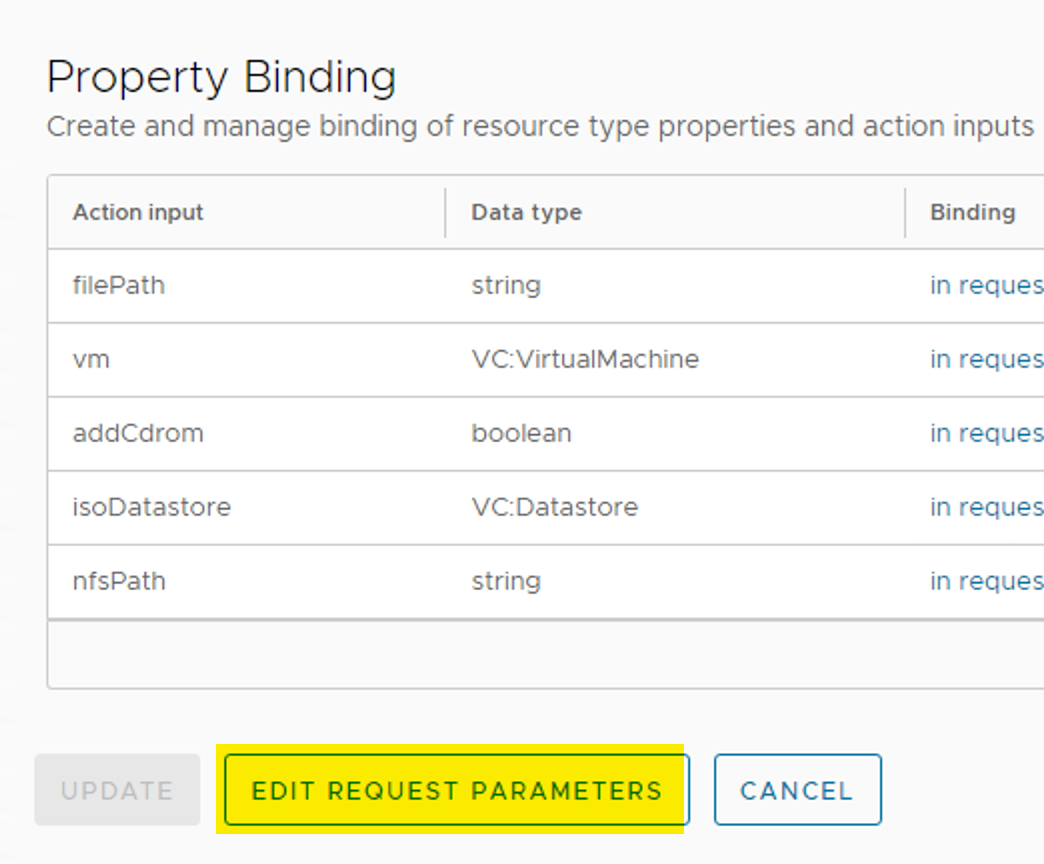
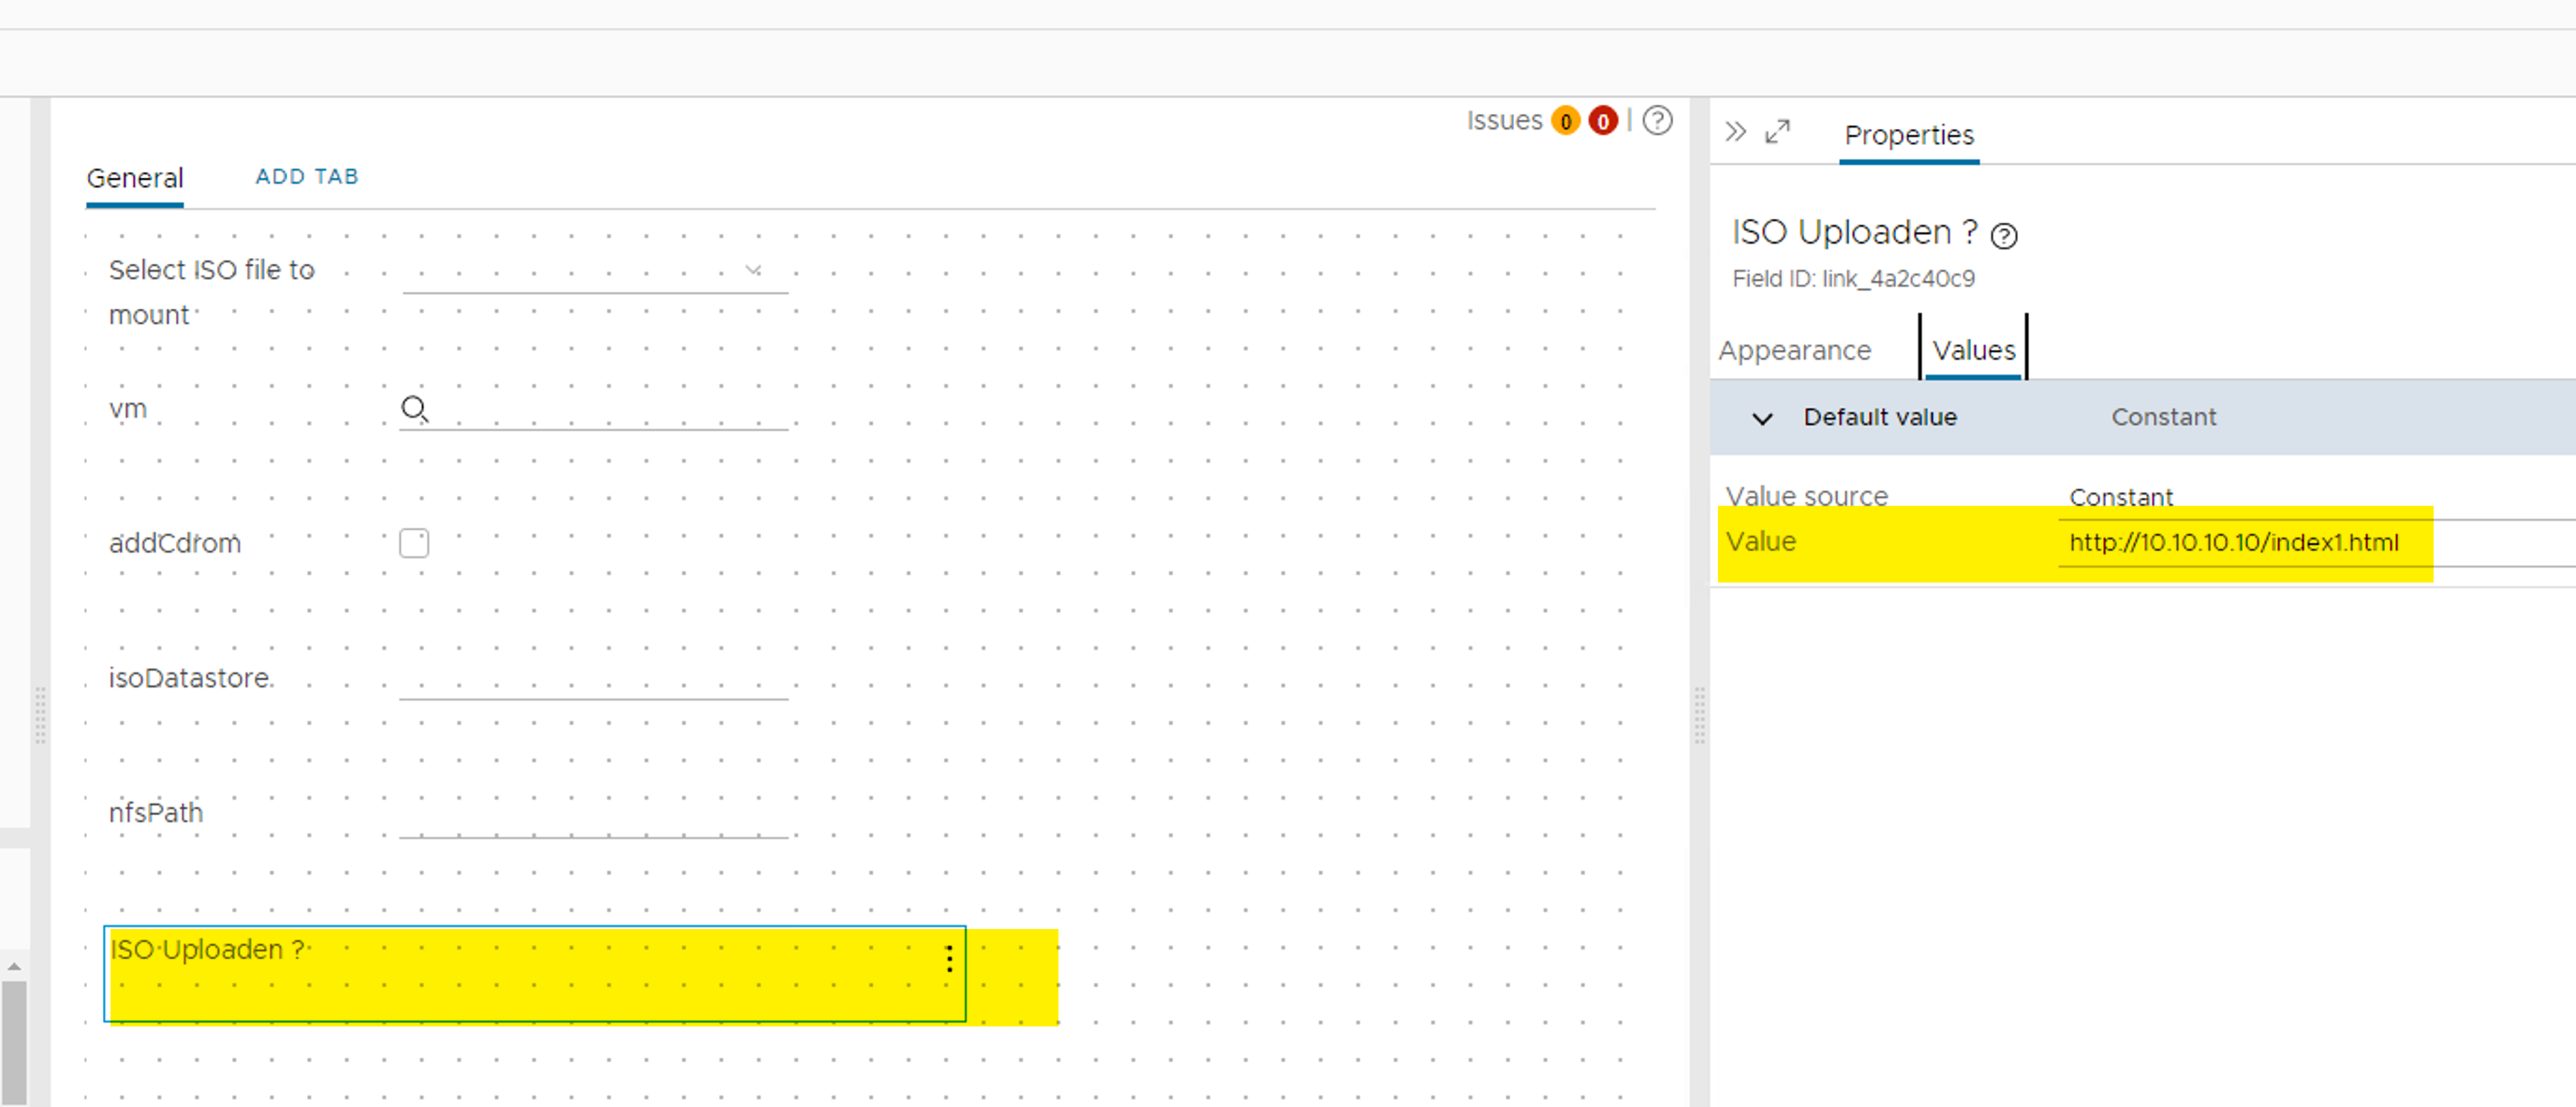
  • Log into vRealize Automation
  • Go to Cloud Assembly
  • Navigate to Design -> Resource Actions
  • click on NEW RESOURCE ACTION
  • Enter a Display name
  • Activate the Resource Action
  • Select the Cloud.vSphere.Machine as Resource Type
  • Select the Mount ISO Workflow
  • click on vm binding “in request” link
  • Select “with binding action”
  • click SAVE
  • click on “EDIT REQUEST PARAMETERS”
  • mark the vm
  • select Value Picker as Display type
  • set Visibility to No
  • mark the isoDatastore
  • set Visibility to No
  • Select the action getNFSDatastore
  • Enter the Attributes as shown above
  • mark the nfsPath
  • set Visibility to No
  • Select the action getConfigurationElementAttributeAsString
  • Enter Atrtibutes as shown above
  • mark the ISO Uploaden ?
  • Enter your URL for the File Uploader Server
  • How to create the File Upload Server is described here https://hferch.de/vra-8/vra-8-iso-uploader-to-a-provided-esxi-nfs-share/

Click on SAVE

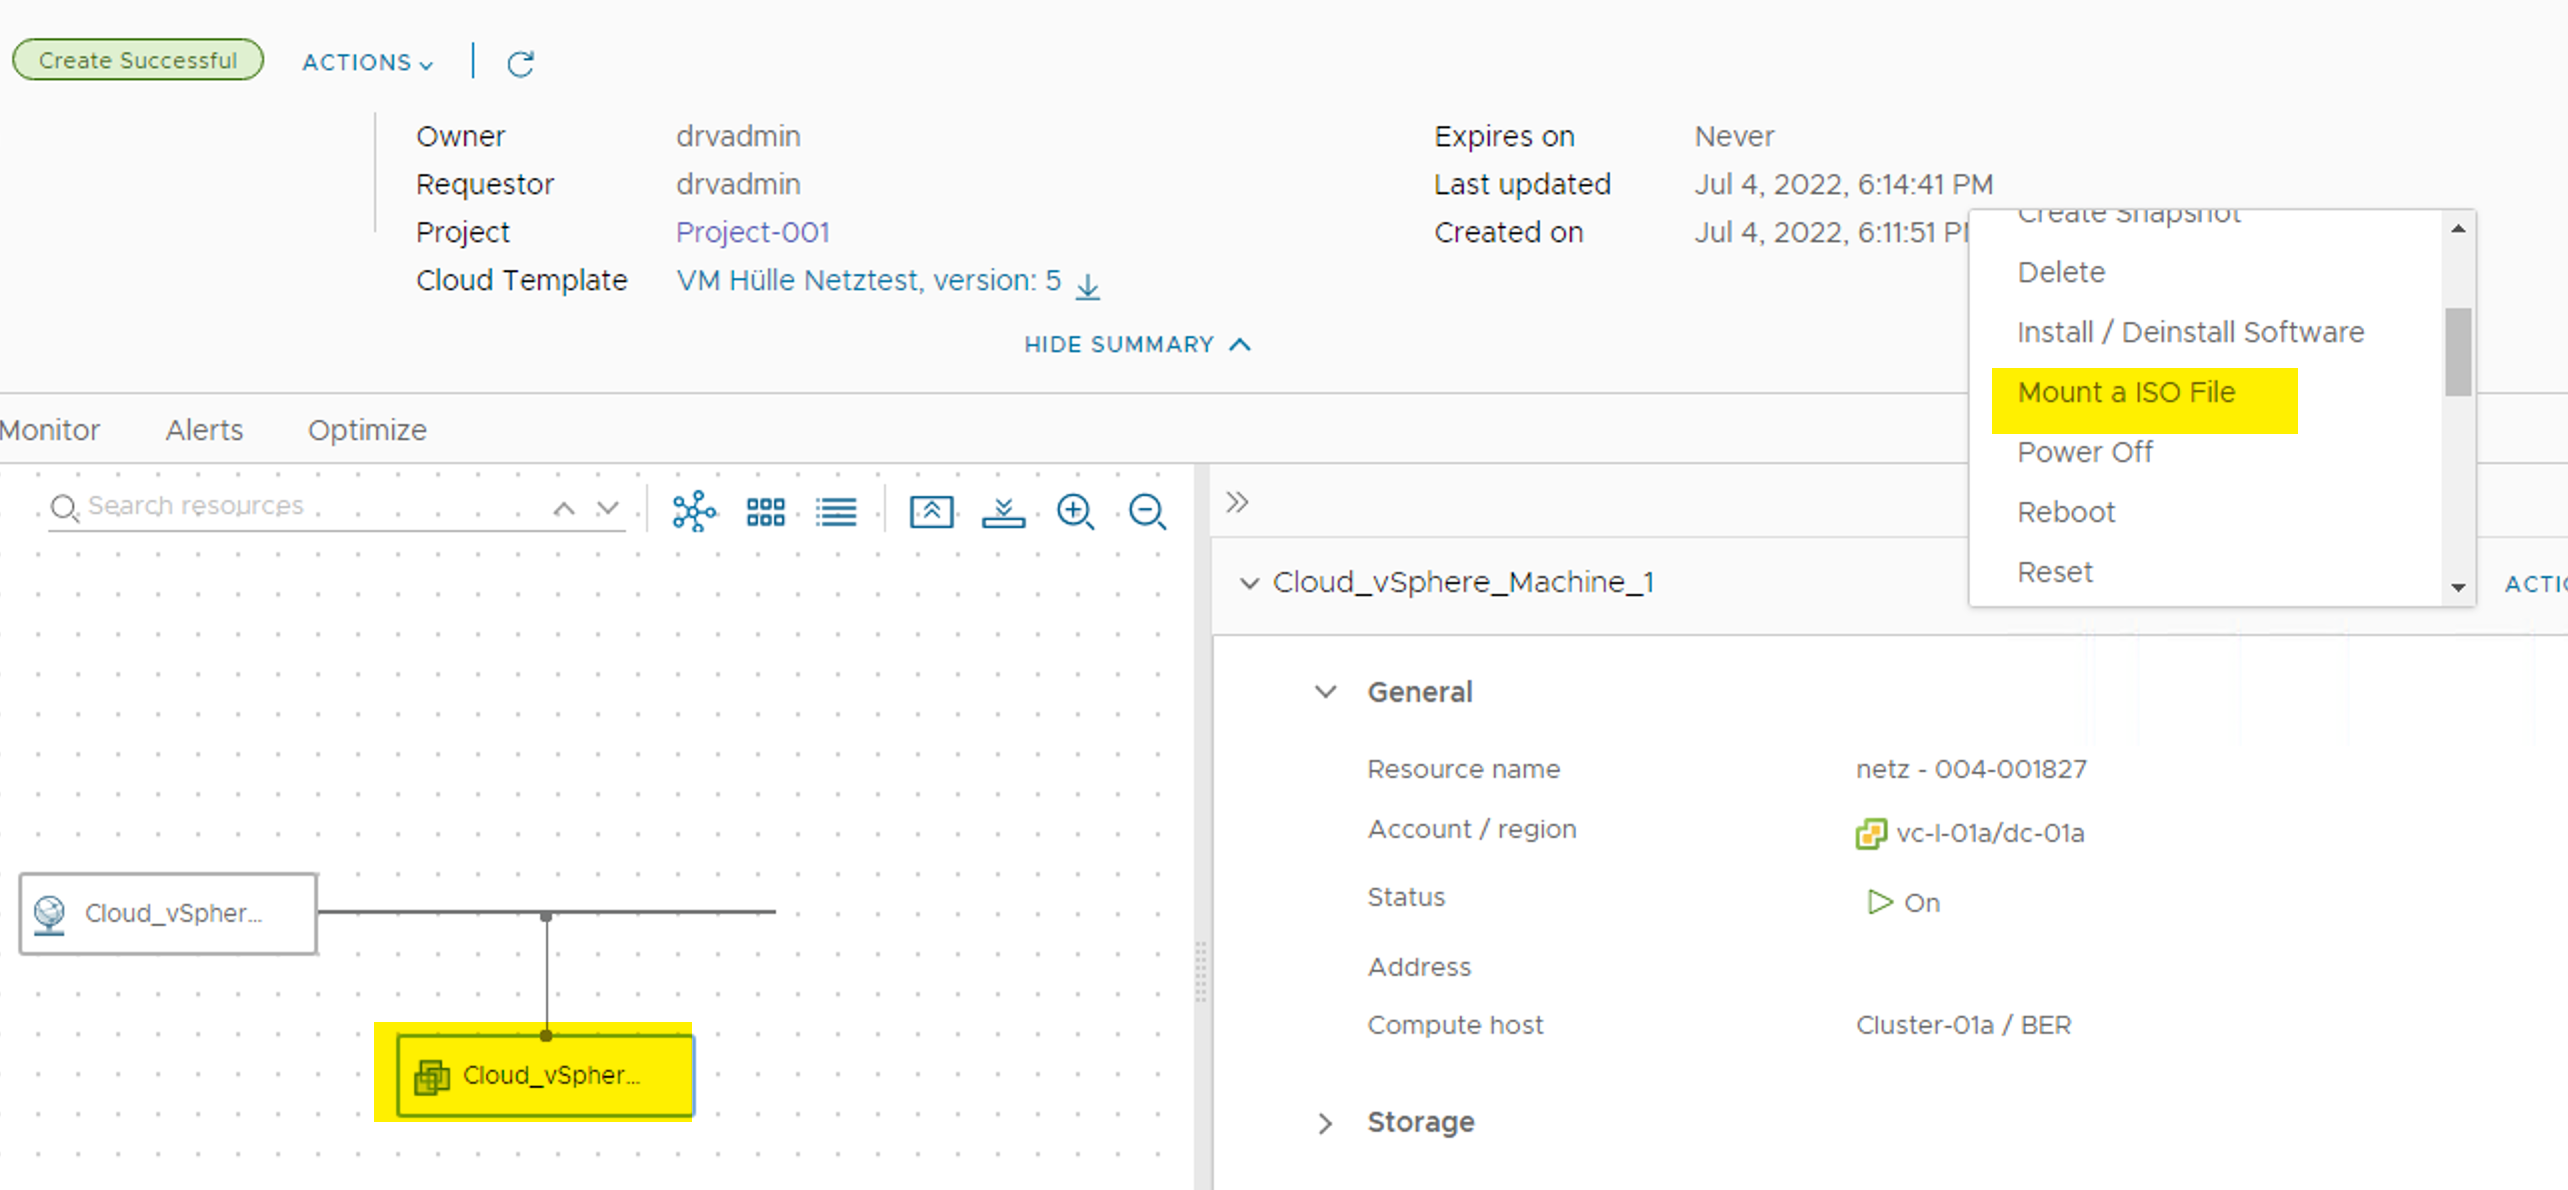
Try the new created “Day 2” Operation
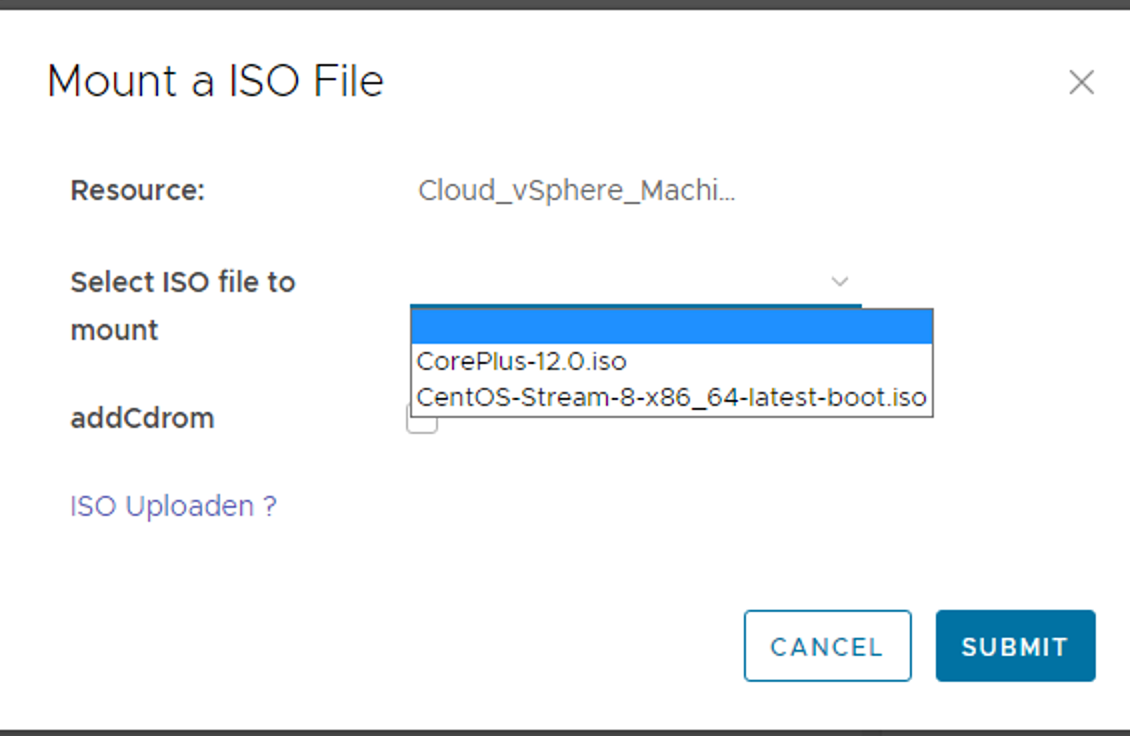
  • Go to Resources -> Deployments
  • Select you VM
  • Go to ACTIONS
  • Select Mount a ISO File “Day 2 ” Operation
  • Select a ISO File from the list
  • Mark AddCdrom, in case the VM has no CD ROM
  • If you want to Upload a ISO File then click on the ISO Uploader Link

Click on SUBMIT

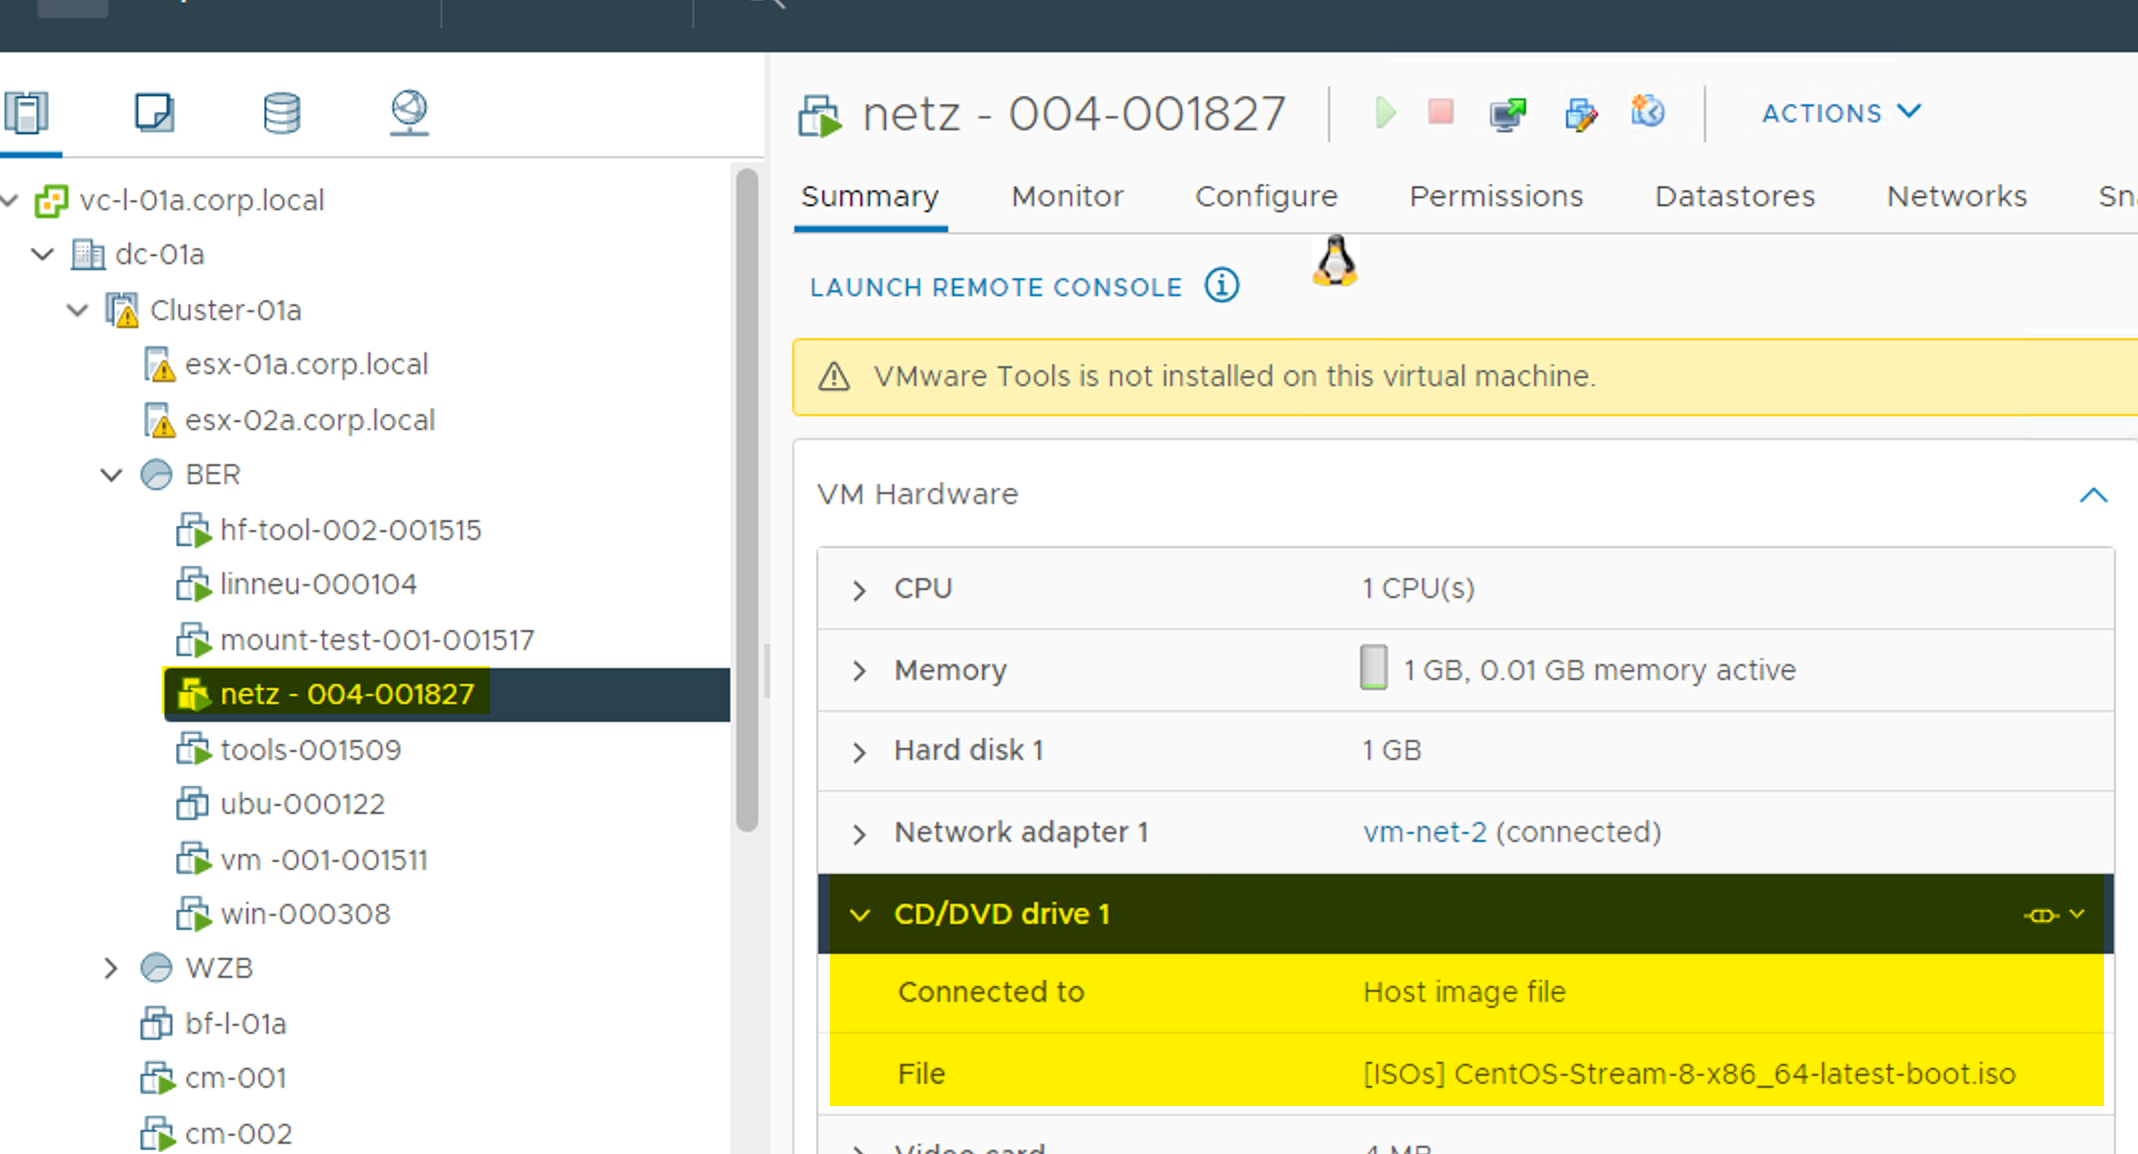
Once the Request was successful, you should see the mounted ISO file on the VM

Similar Posts

Leave a Reply

Your email address will not be published.

WC Captcha 72 − = 62